
How Countdown Timer Works in Postcards
A countdown timer shows your readers exactly how much time is left before an offer closes, a sale ends, or a webinar starts. It creates urgency in a way static text can't, and it's one of the most effective ways to drive clicks in a promotional email.
Postcards includes a built-in Countdown element, so you no longer need a third-party service to add one. You add it like any other element, style it to match your design, and it regenerates every time the email is opened.
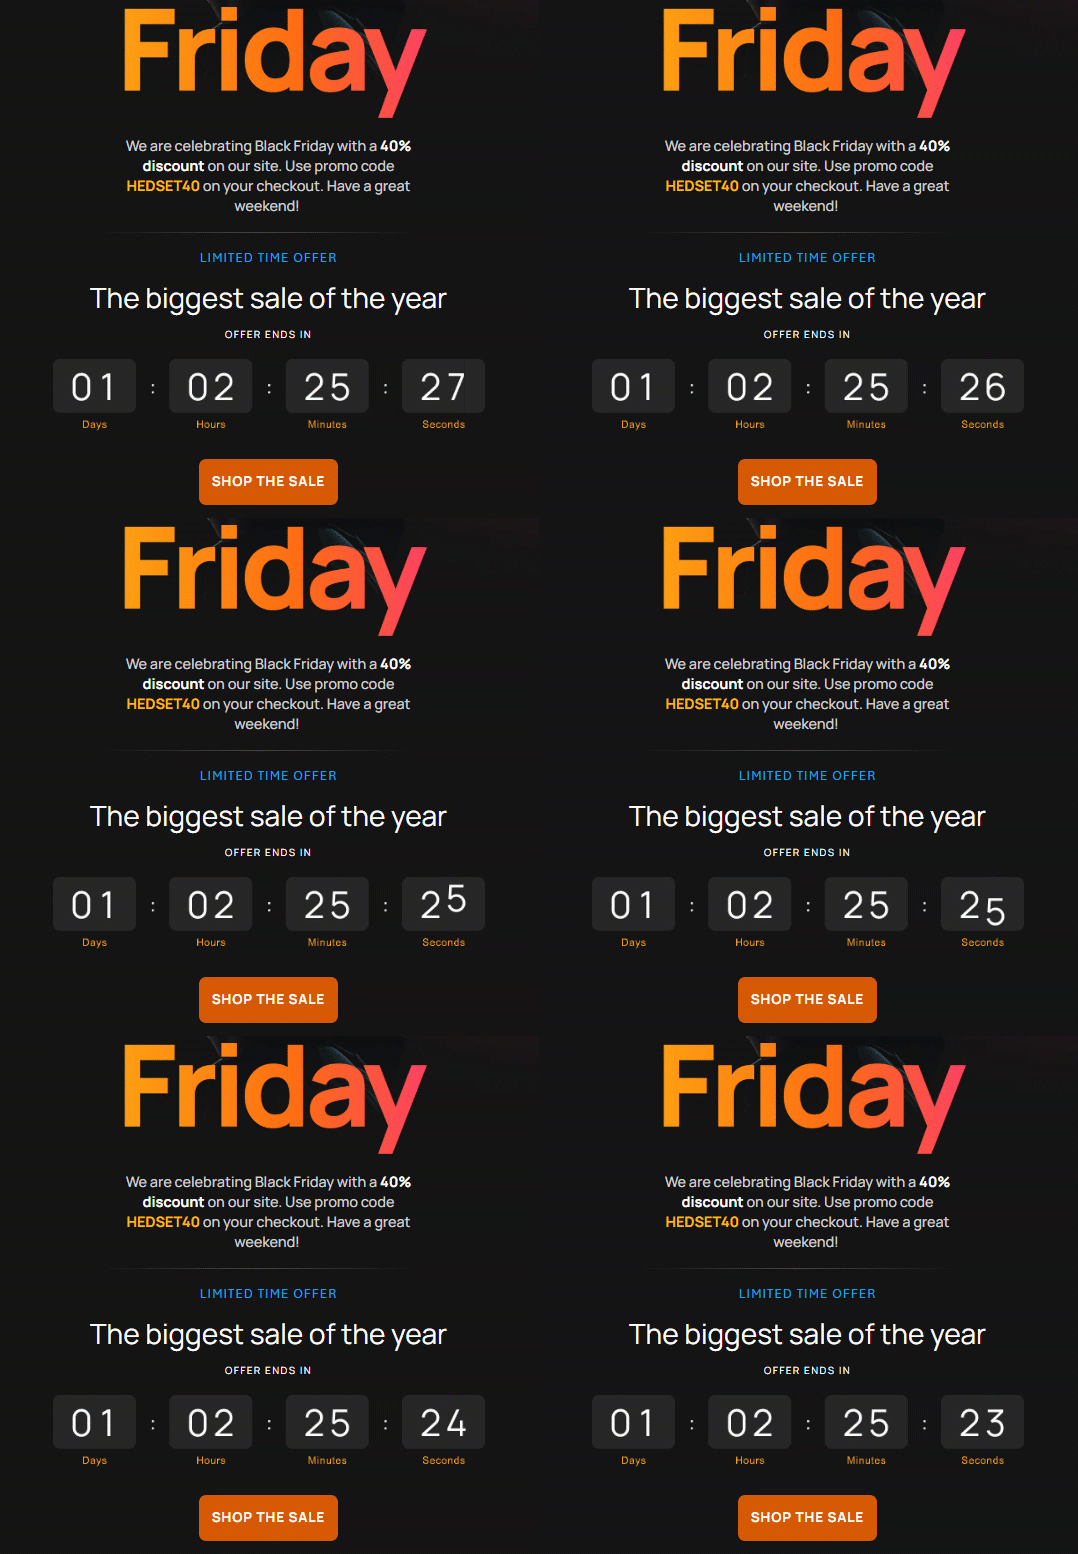
Availability
The Countdown Timer is available on the Plus and Pro plans. See the Postcards pricing page for more details on what each plan includes.
You can check the plan your workspace is on under Workspace Settings → Workspace, on the Plan card.
Adding a Countdown Timer
There are two ways to add a countdown to your email, depending on whether you want a ready-made block or a single element inside a layout you've already built.
From the left panel (pre-built module)
This is the fastest way to get started. The module arrives already laid out, with the timer sized and positioned inside a container you can restyle.
- Click the blue plus (+) button in the top bar to open the module picker.
- Go to Dynamic Content.
- Choose one of the countdown modules and click it to add it to your email.
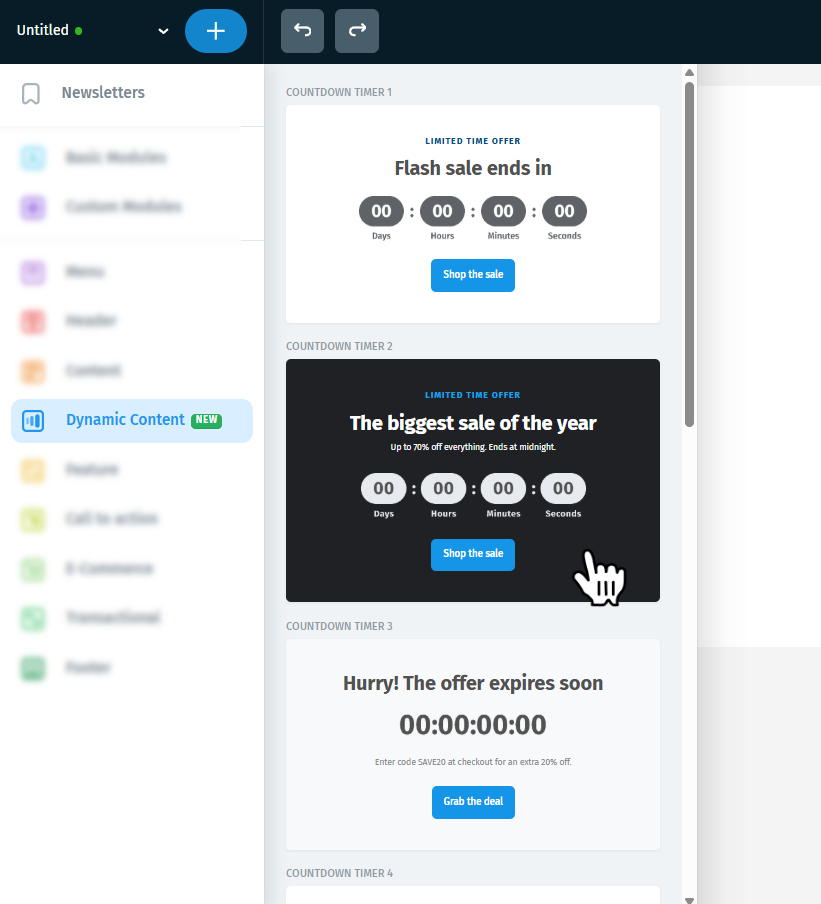
Note: Dynamic Content holds the ready-made countdown layouts. If you'd rather start from a bare timer with no surrounding design, the Countdown element sits at the end of the Basic Modules list.
From the bubble menu (single element)
If you already have a module in place and just want a timer inside it, add the element directly:
- In the Layout panel on the left, hover above or below an existing element — a small plus (+) button appears.
- Click it to open the bubble of available elements.
- Select Countdown to insert the timer in that exact position.
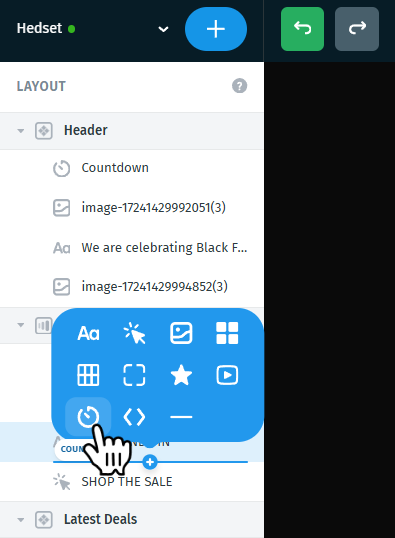
Tip: Once you've styled a timer the way you like it, save the surrounding module as a custom module so you can reuse it in your next campaign without setting it up again.
Setting the expiration
Select the countdown element and the settings panel on the right opens on COUNTDOWN.
The EXPIRATION section is where you set what the timer is counting down to.
Time zone
The first field is the time zone, and it's the one to get right before anything else. It defaults to (GMT+00:00) UTC. Click the dropdown to pick a different zone — the list covers every zone with its GMT offset, and there's a Search field at the top so you can type a city or region instead of scrolling.
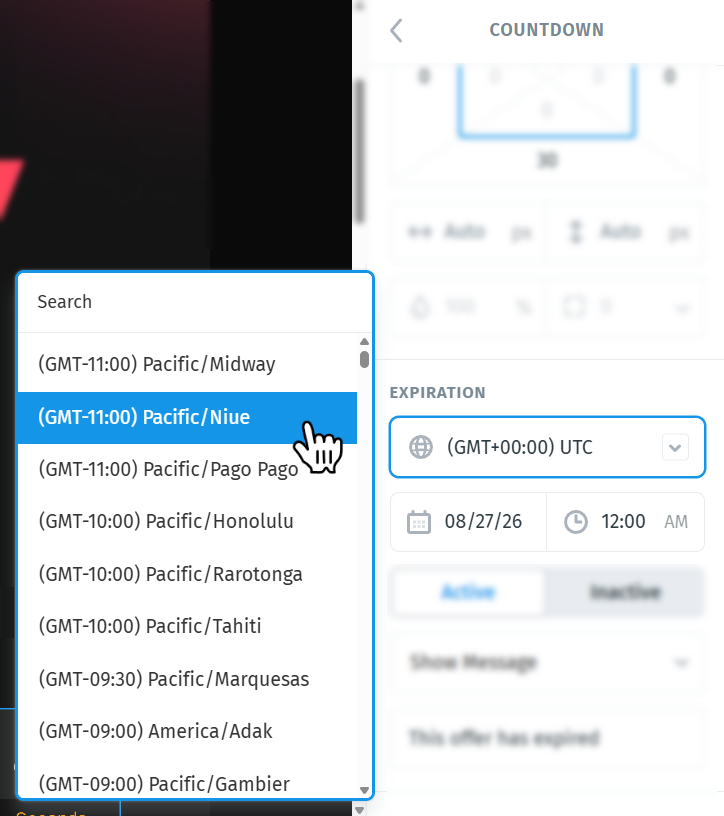
Important: The deadline is anchored to the zone you choose here, not to each reader's local time. Pick the zone your deadline is actually defined in — if your sale ends at midnight New York time, choose a New York zone rather than leaving it on UTC.
Date and time
Set the date (MM/DD) and the time (hh:mm AM/PM) the countdown runs down to.
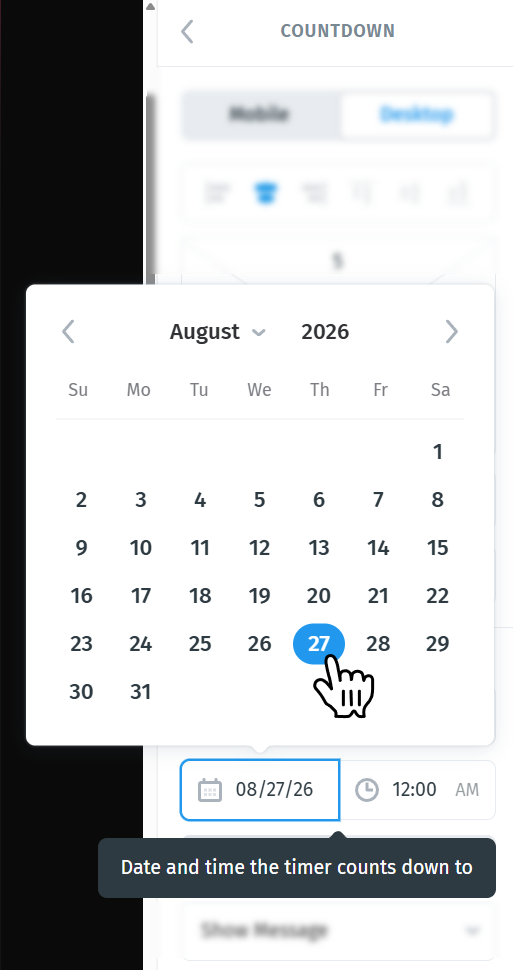
Tip: Give yourself a buffer. If a campaign goes out later than planned, a timer that has already expired is worse than no timer at all.
Active and Inactive
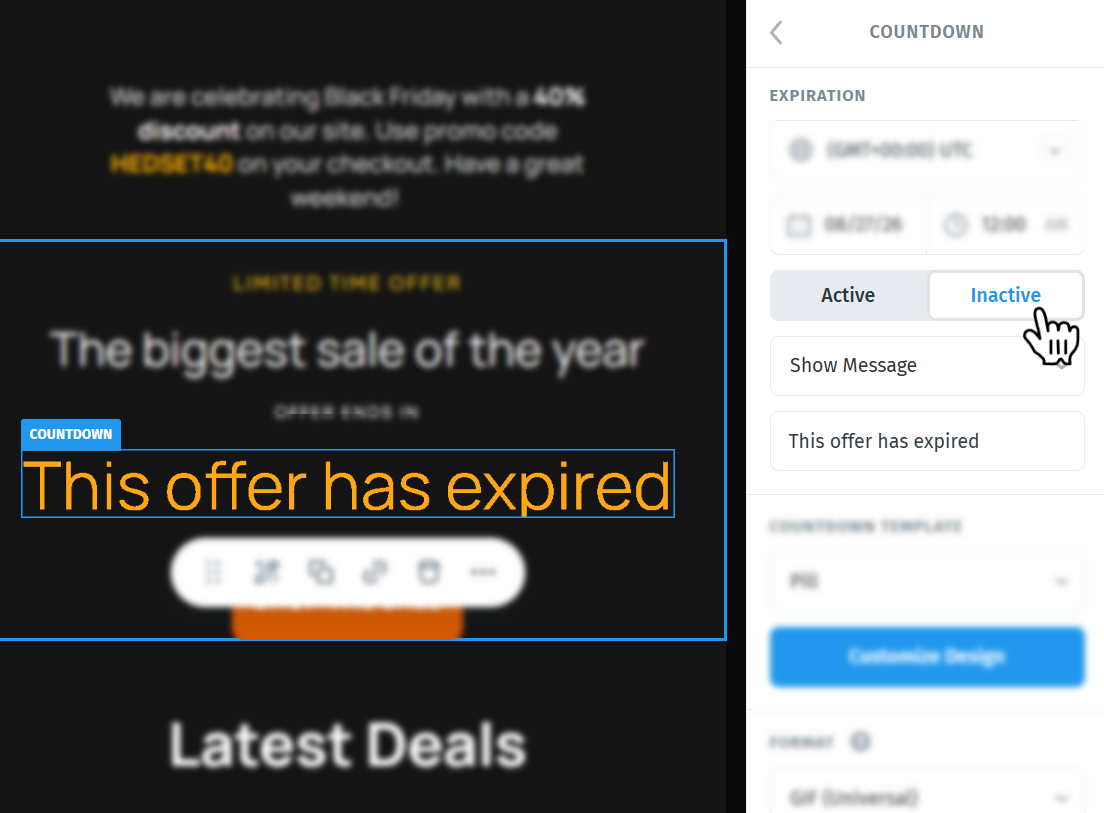
The Active / Inactive switch controls what you see on the canvas while you're designing — a live timer, or a preview of the expired state. Switch to Inactive to check that your expired state looks right without waiting for the deadline to pass.
What happens when the countdown ends
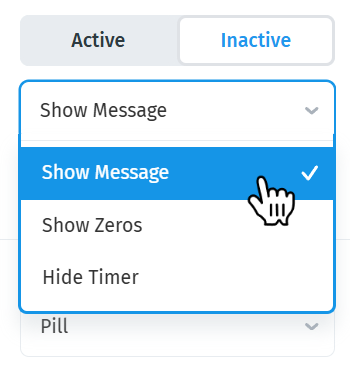
Under the Active/Inactive switch, a dropdown sets what readers see once the deadline has passed. There are three options:
- Show Message — replaces the timer with a line of text. The field below holds the message, and it starts as "This offer has expired". Edit it to say whatever fits your campaign.
- Show Zeros — keeps the timer visible with every unit at zero.
- Hide Timer — removes the timer from the email entirely.
Tip: Show Message is usually the strongest choice. A row of zeros tells readers they're too late without telling them what to do next — a message can point them somewhere useful instead.
Choosing a countdown template
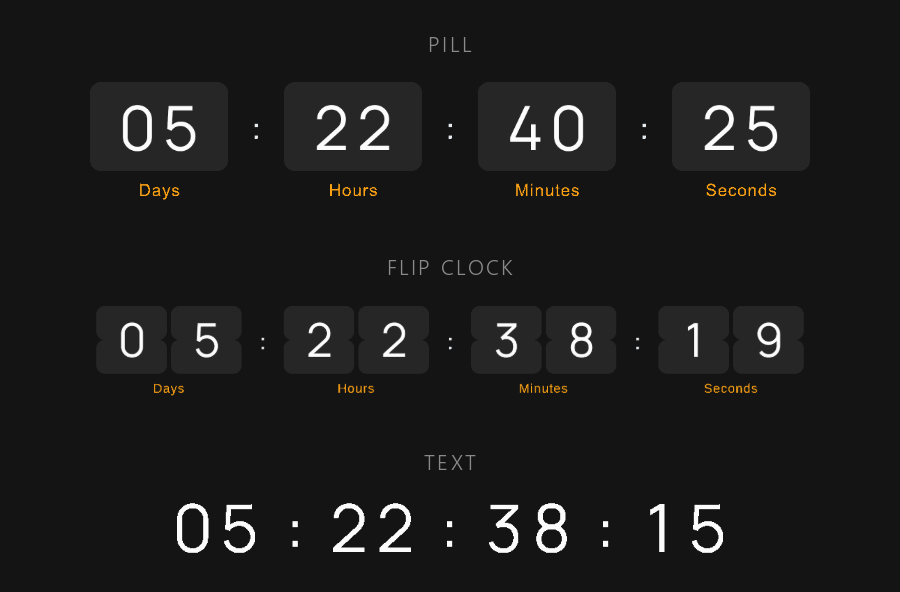
The COUNTDOWN TEMPLATE dropdown sets the overall style of the timer. There are three:
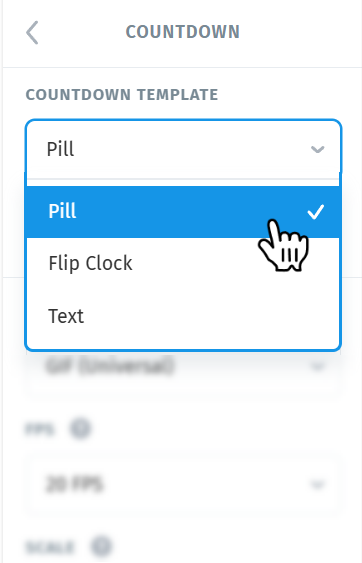
- Pill — each unit sits in its own rounded block
- Flip Clock — a split-flap look, where the digits fold as they change
- Text — plain digits with no container, the most minimal option
Customizing the design
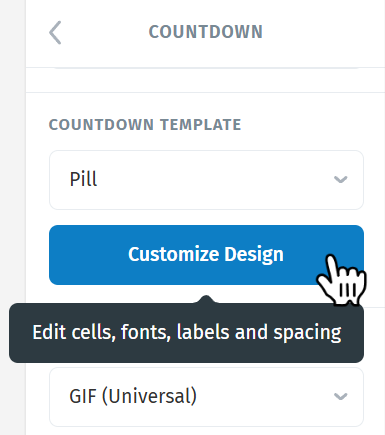
Click Customize Design under the template dropdown to open the styling panel. It runs top to bottom in roughly the order you'd want to work: choose which units appear, rename them, set the spacing and shape, then style the digits, labels and separator separately.
Time units
The TIME UNITS checkboxes control which units the timer displays. Days is the only one you can switch off — Hours, Minutes and Seconds are always shown.
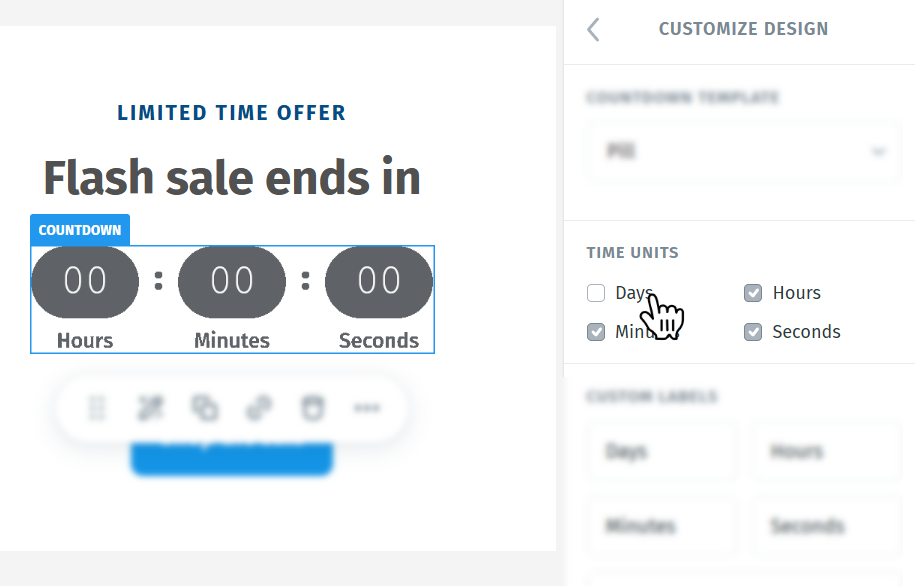
Tip: Switch Days off when your deadline is less than 24 hours away. A unit reading 00 makes the timer look broken rather than urgent.
Custom labels
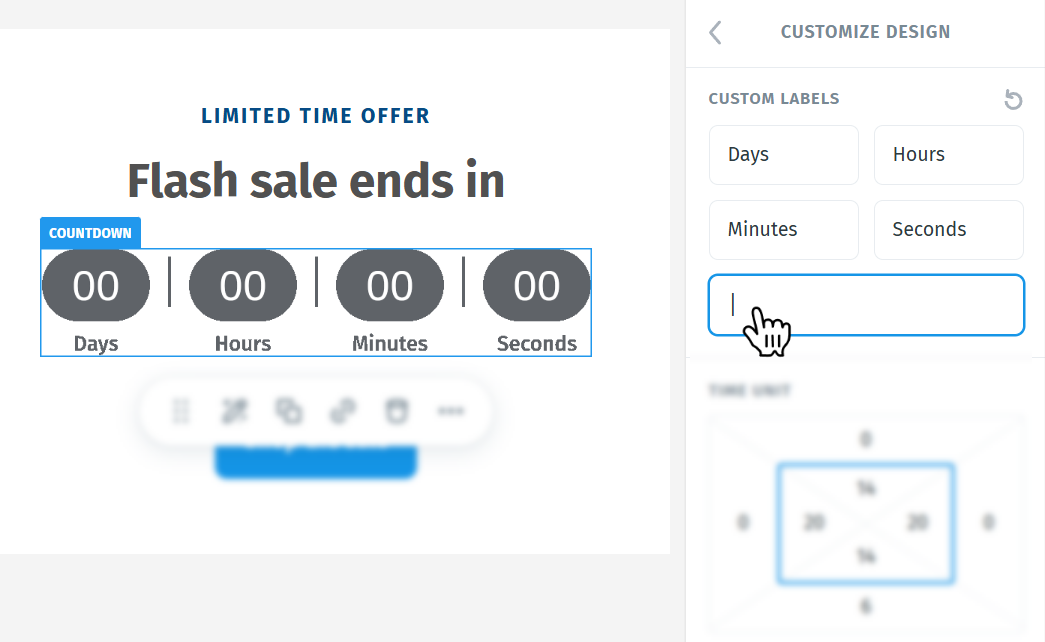
The CUSTOM LABELS fields override the words printed under each unit. Use them to shorten the labels for a narrow layout, or to translate them for a campaign in another language.
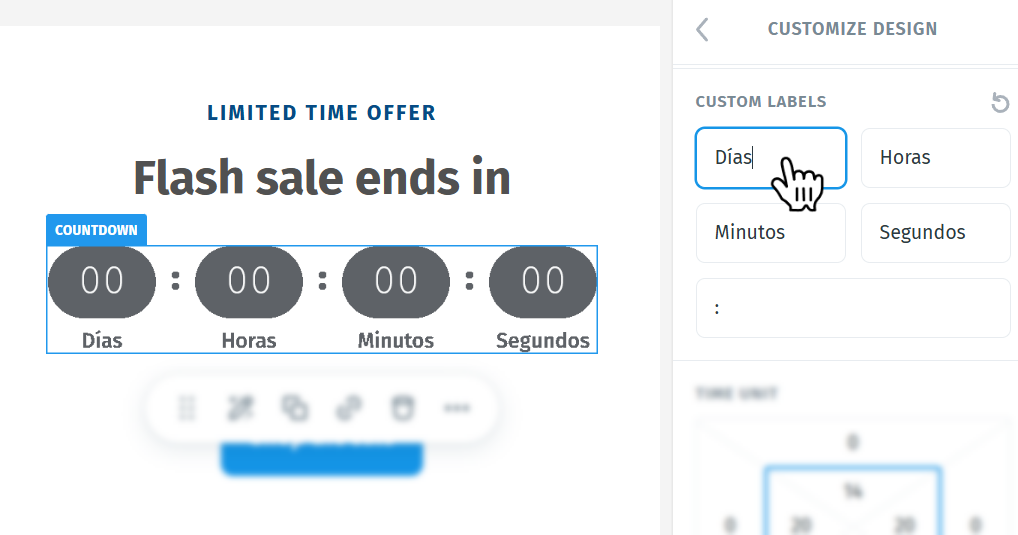
The last field sets the separator — the character printed between the units. It's a colon by default, and you can replace it with any character you like.
Spacing and shape
The TIME UNIT box sets the space in and around each unit block: the inner values are padding, the outer values are margin.
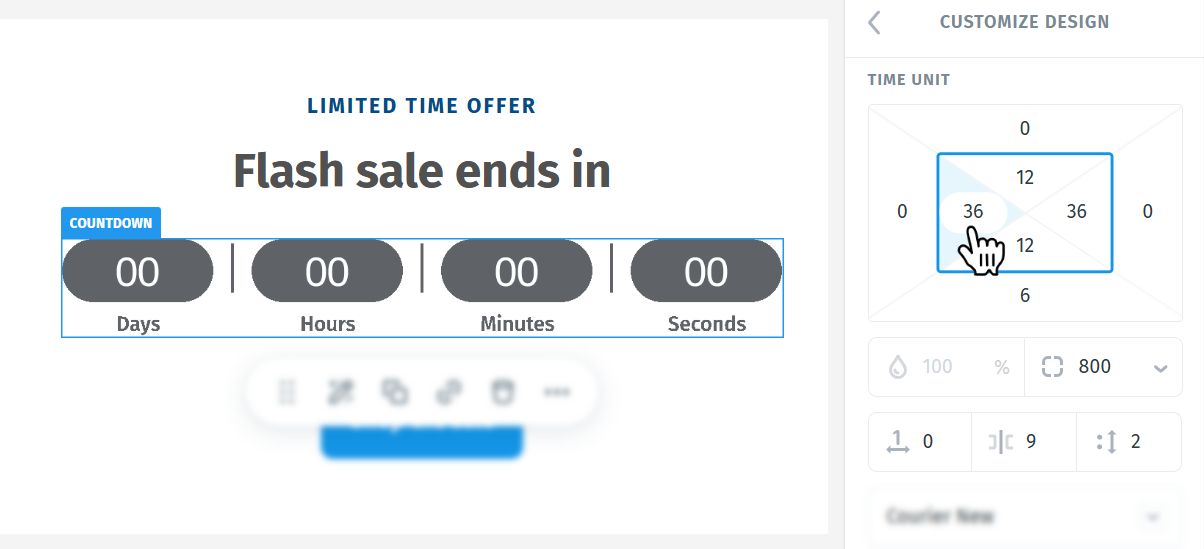
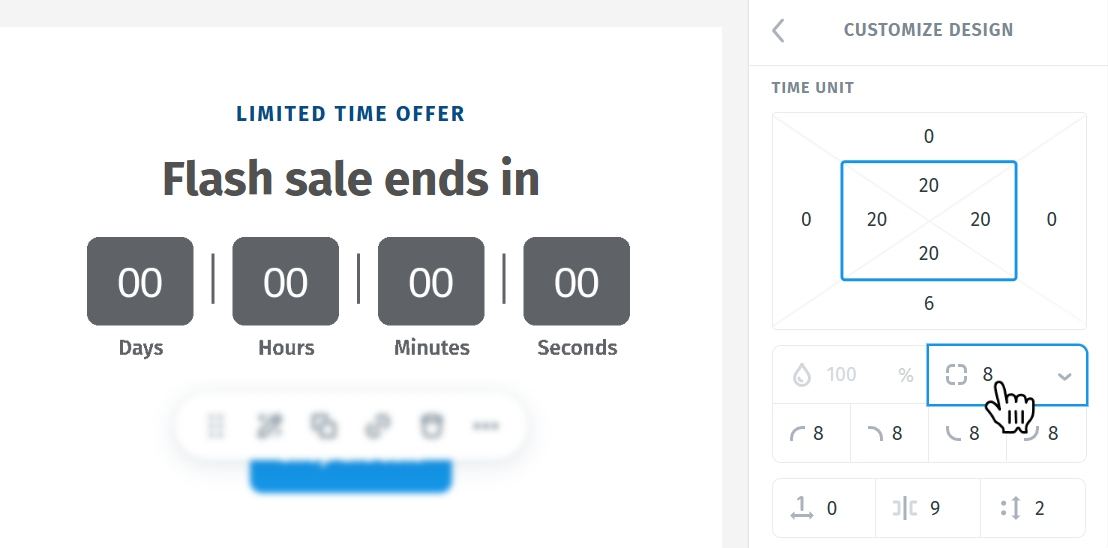
Beside it, corner radius controls the shape of the blocks. A high value like 999 gives you the fully rounded pill shape; lower values square them off. Click the down arrow to set each corner individually.
Three fine-tuning controls sit below:
- Gap between the digits of one number — the space between the two characters inside a single unit, for example the 4 and the 7 in 47 minutes
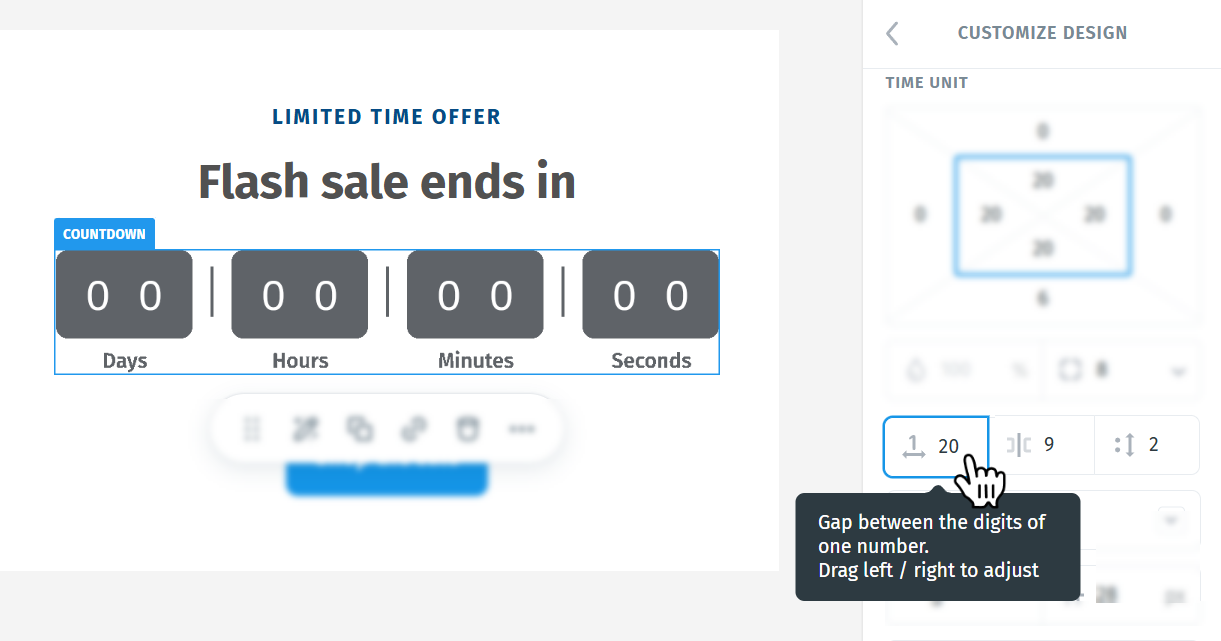
- Gap between the time units — the space between days, hours, minutes and seconds
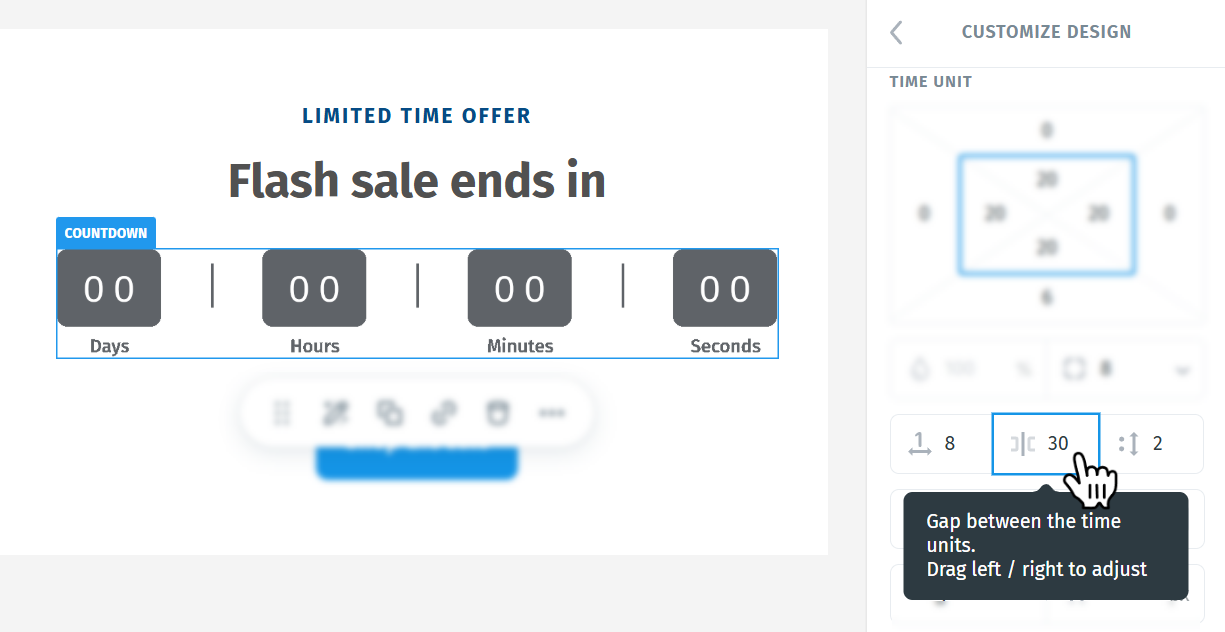
- Separator position — nudges the separator characters up or down, so you can optically center them against the digits
Each can be dragged left or right to adjust, or typed in directly.
Digits
Set the font, weight, size and color for the numbers, and the BACKGROUND color of the block behind them.
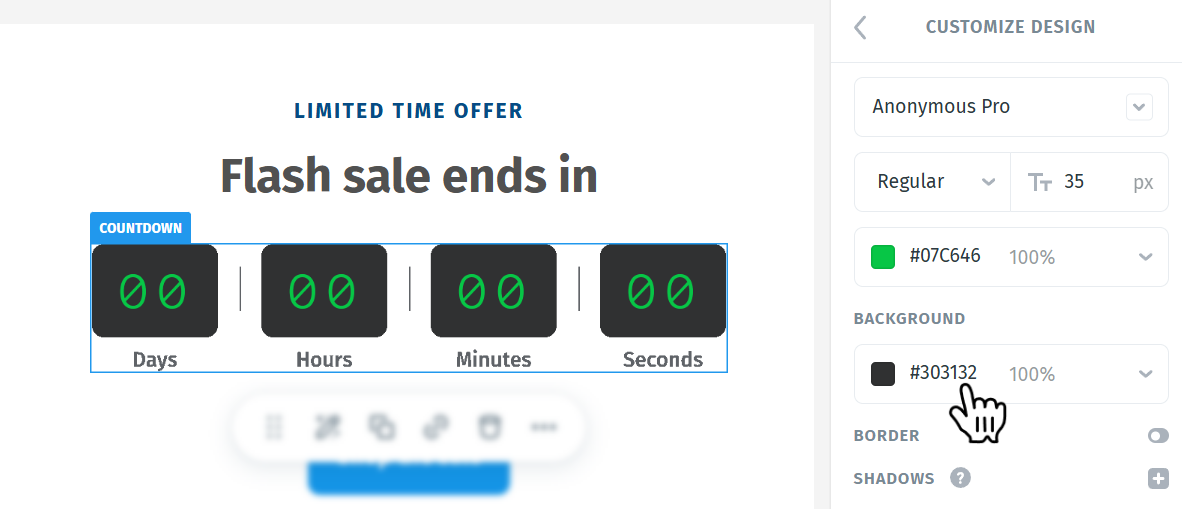
BORDER is off by default. Switch it on to outline each unit block, then choose the line style — Solid, Dotted or Dashed — and set its width in pixels along with its color and opacity. A border earns its place when the block background sits close in tone to the email behind it and the units need a defined edge.
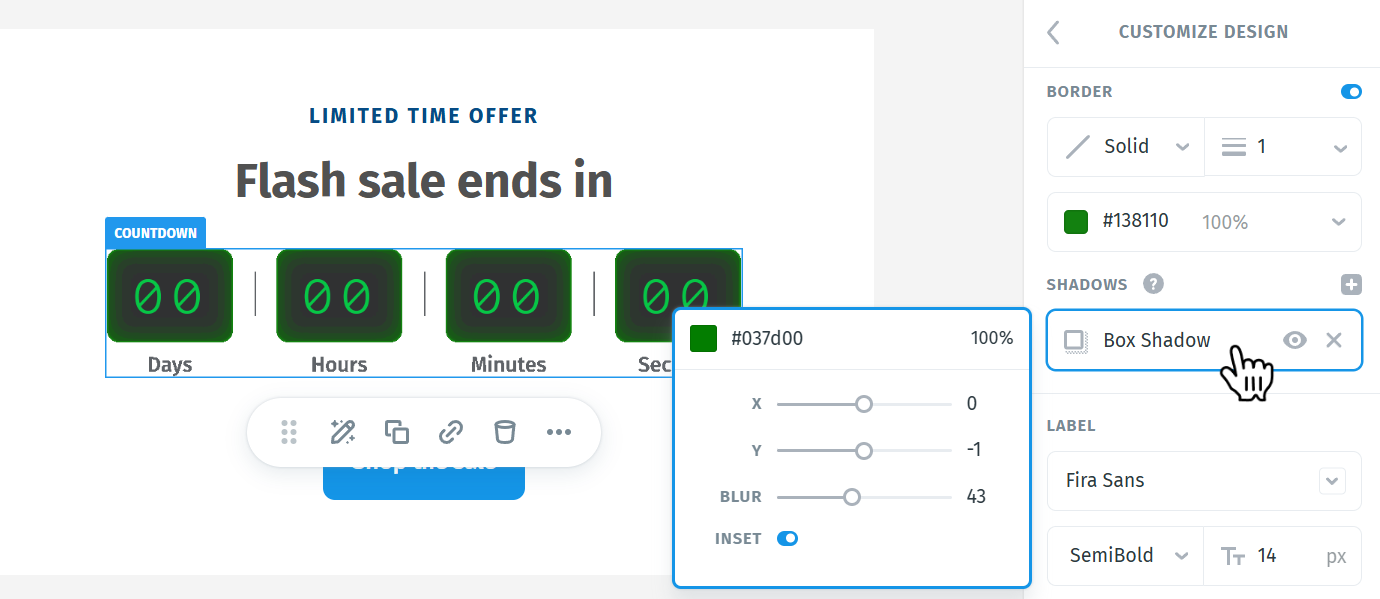
SHADOWS is also off by default. Click the + button beside it to add one. Each shadow appears as its own Box Shadow row, with an eye icon to hide it temporarily and an × to delete it. Click the row to open its controls:
- Color and opacity
- X and Y — how far the shadow is offset horizontally and vertically. Set both to 0 and the shadow spreads evenly on every side, which is what turns it into a glow rather than a drop shadow.
- Blur — how soft the shadow is. Low values keep a hard edge; high values diffuse it.
- Inset — draws the shadow inside the block instead of behind it. That reads as depth or an inner bevel rather than the block lifting off the page.
You can stack several shadows on the same element by clicking + again. Each new one is drawn over the last, so a tight dark shadow paired with a wide soft one gives you more depth than either on its own.
Tip: Because the timer is rendered as an image on our servers, any font you pick here is guaranteed to display. You can use a display font you'd normally avoid in an email without worrying about how each client handles it.
Labels
The LABEL section styles the captions under each unit independently of the digits: font family, weight, size, line height, letter spacing and color.
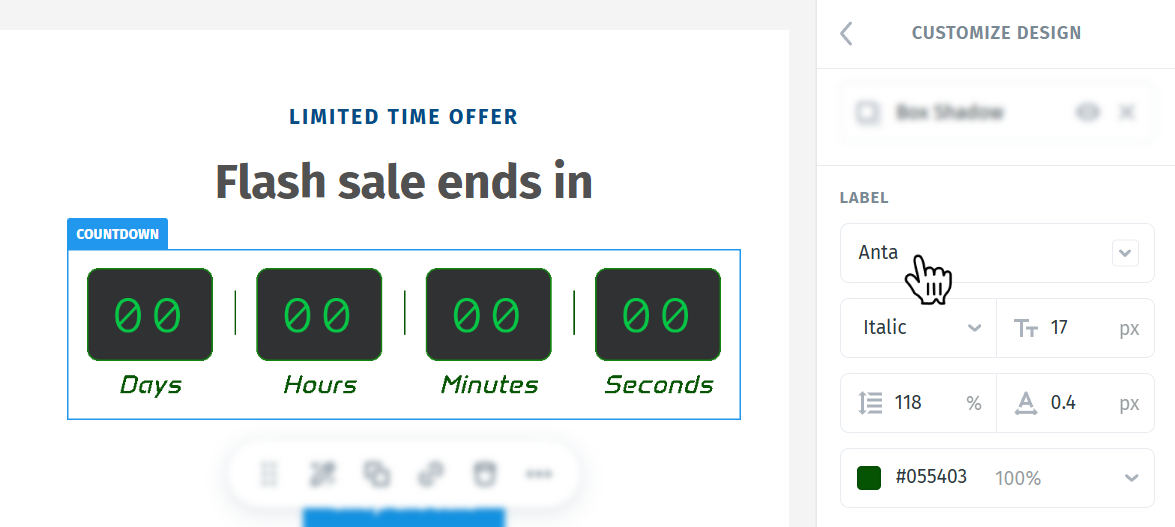
Tip: Labels work best noticeably smaller and lighter than the digits, with a little extra letter spacing. The numbers are what you want read first — the labels only need to identify what each number means.
Separator
The SEPARATOR section styles the characters between the units, with its own font, weight, size and color, separate from the digits.
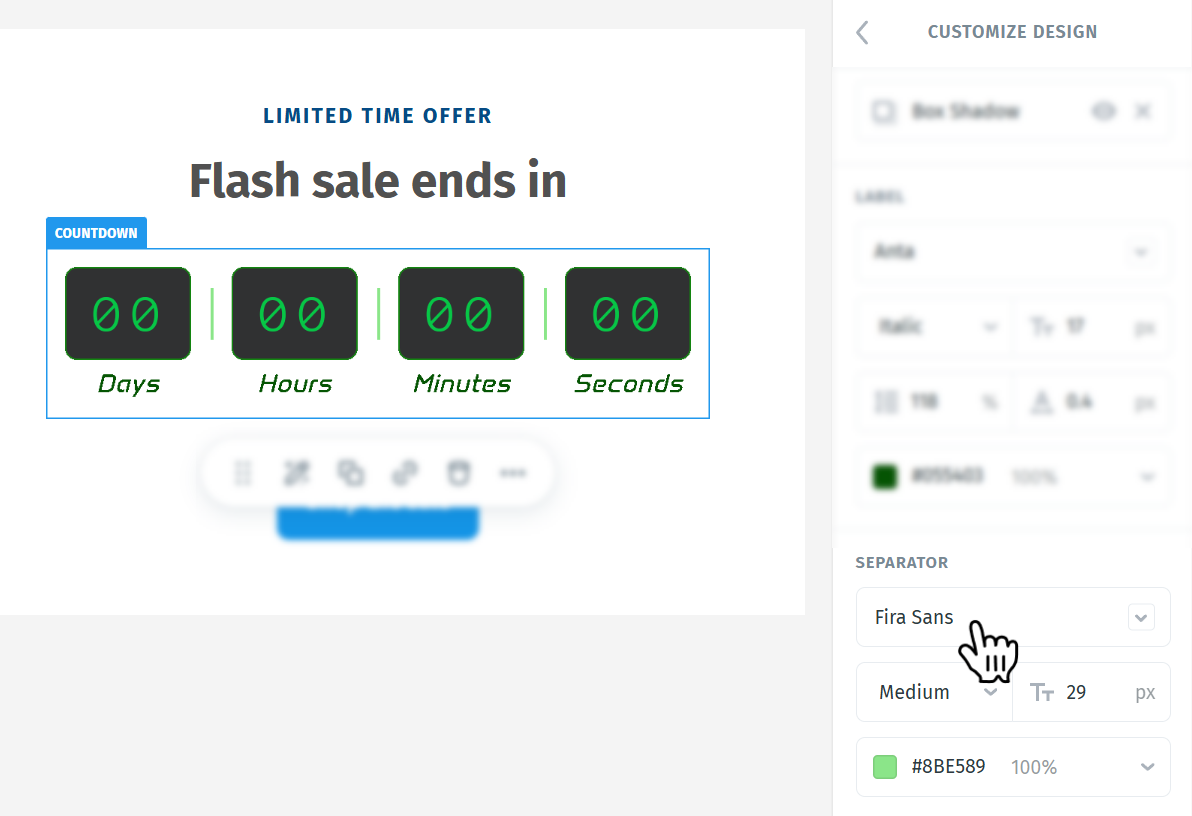
Tip: Set the separator a step lighter or more muted than the digits. At the same weight and color it pulls as much attention as the numbers do.
Output settings
Email clients block JavaScript, so no email countdown anywhere is a live, ticking clock the way a web page is. Postcards generates your timer as an animated image on our servers, and this group of settings controls how that image is produced. It's also where you manage the trade-off between quality and file size.
Format
- GIF (Universal) — the safest choice, supported essentially everywhere
- APNG (Sharper) — noticeably better image quality, but not supported by every email client
Start with GIF unless you know your audience is concentrated in clients that handle APNG well.
FPS
FPS sets how smoothly the animation plays each second. A higher rate renders the motion in more steps for smoother playback, at a larger file size. At 1 FPS you get key frames only, with no motion at all.
What "motion" means depends on your template: the Flip Clock template folds, while Pill and Text roll their changing digits.
Scale
Scale renders the image at a higher pixel density than its display size, so it stays sharp on high-resolution screens. The options are 1×, 1.5× and 2×. Higher values look crisper and weigh more.
Size
The SIZE readout tells you the cost of the settings above before you send, with a status indicator that flags when your choices are getting expensive. It shows:
- Size — the weight of the generated image
- Render — how long the image takes to generate
- Display — the dimensions the timer occupies in the email
- Actual — the real pixel dimensions after the scale multiplier is applied
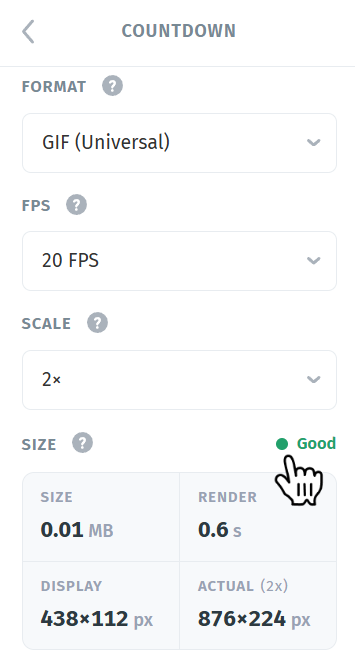
Tip: If the size indicator turns against you, drop the FPS before you drop the scale. Losing a few frames of smoothness is far less noticeable than a soft, low-resolution timer.
Link and anchor
The LINK toggle is off by default. Switch it on to make the whole timer clickable, then choose URL to send readers to a page, or Anchor to jump to a section within the same email.
The ANCHOR toggle lets you name this spot so other links can point at it.
Note: Anchor links only work in a few email clients. Use a full URL for anything important.
Apple Mail and Mail Privacy Protection
Apple Mail preloads and caches images when a message is delivered rather than when it's opened. Because of this, a live countdown can freeze at the cached moment and show the wrong time remaining when the reader actually opens the email.
Postcards gives you a dedicated option to hide the timer in Apple Mail, so those readers see no countdown rather than an inaccurate one.
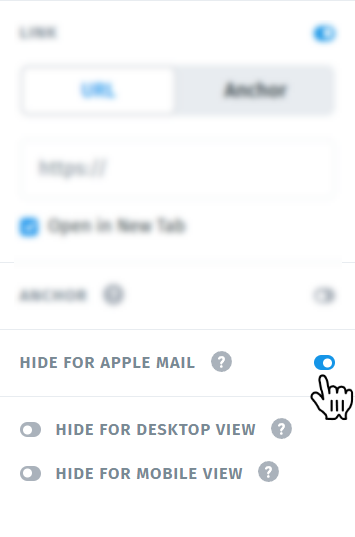
Tip: This is a good reason to always write the deadline out in text next to the timer ("Offer ends Friday at midnight"). Readers who don't see the countdown still get the message — and so do readers who have images turned off entirely.
Email client support
Most clients — Gmail, Apple Mail, Outlook, Outlook.com and mobile clients — display the timer's animation as intended. Some older desktop mail clients show only the first frame rather than animating, but readers there still see the correct time remaining, because the image is generated fresh each time the email is opened.
You can check how your email renders before sending — see How to Preview Your Template Across Email Clients in Postcards.
Using the Countdown Timer with AI
The countdown works with the AI features in Postcards. Templates generated with Create With AI can include countdown timers, and you can ask the AI to add or adjust one in a project you're already working on — the same way you would with any other element.
See MCP Getting Started if you're driving Postcards from an AI client rather than the editor.
Current limitations
- Images off — the timer is an image, so readers who block images won't see it.
Seeing it in context
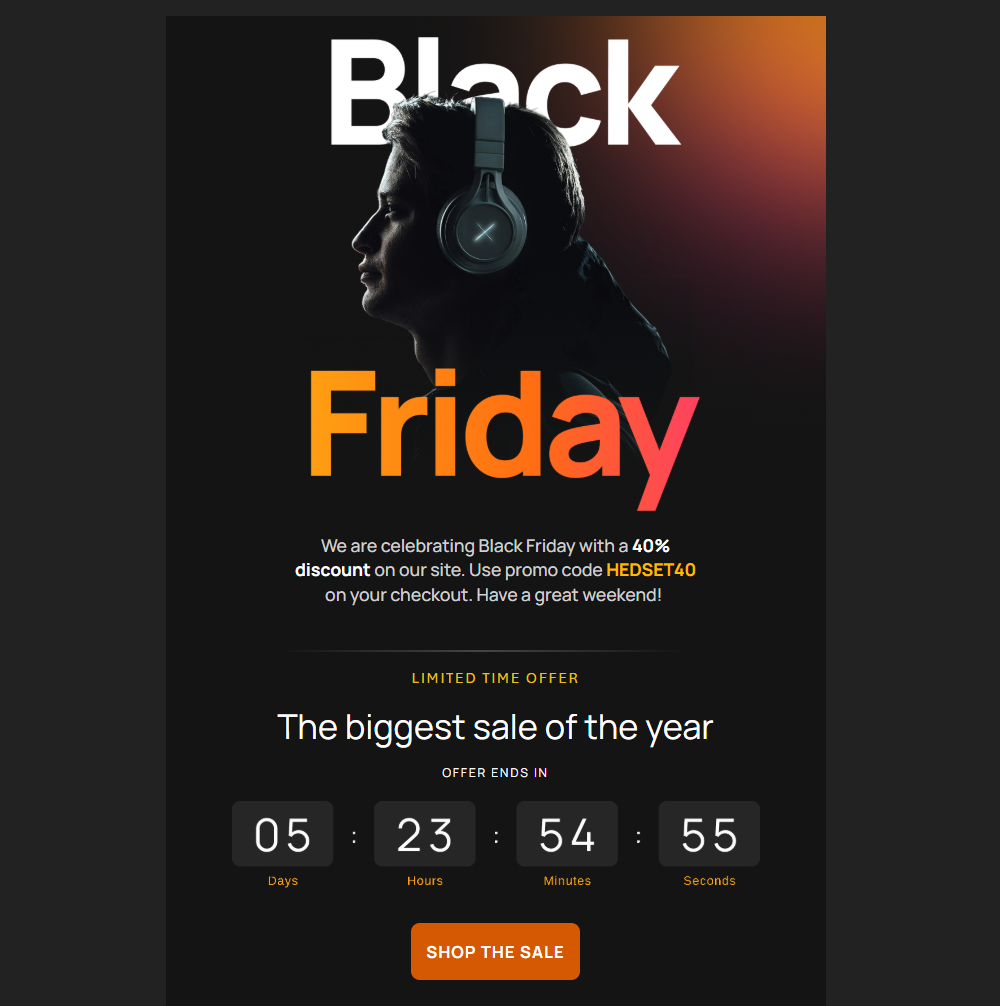
Here's the countdown in a finished campaign. It sits between the offer and the call to action, so the reader meets the deadline right as they're deciding whether to click — and the digit blocks pick up a tone already in the email rather than introducing a new one.
Frequently asked questions
- Does the countdown keep running while the email is open?
Not indefinitely. The image is generated when the email is opened and animates for a short stretch. Reopening the email generates a fresh image showing the correct time remaining.
- The seconds reached zero but the minutes didn't change — is that broken?
No. The animation is a fixed-length clip created at the moment the email is opened, so units above seconds don't roll over during playback. When the clip reaches its end it holds on the last frame. Opening the email again generates a new clip with the current time remaining.
- Which time zone does the deadline use?
The one you select in the EXPIRATION section. It defaults to UTC, so change it if your deadline is defined somewhere else.
- Can I see what the expired state looks like before the deadline?
Yes — switch the timer to Inactive to preview it on the canvas.
- Can I use the same timer in more than one email?
Yes. Style the module once and save it as a custom module to reuse it. Each project keeps its own expiration, so update the date and time when you reuse it.