
Importing HTML Emails into Postcards
Import HTML lets you bring a ready-made HTML email from another builder, an ESP, or hand-written code into Postcards and turn it into a native, editable project. Instead of just wrapping your code, Postcards rebuilds the email out of its own modules, so once it's imported, you can edit everything exactly like a project you built from scratch.
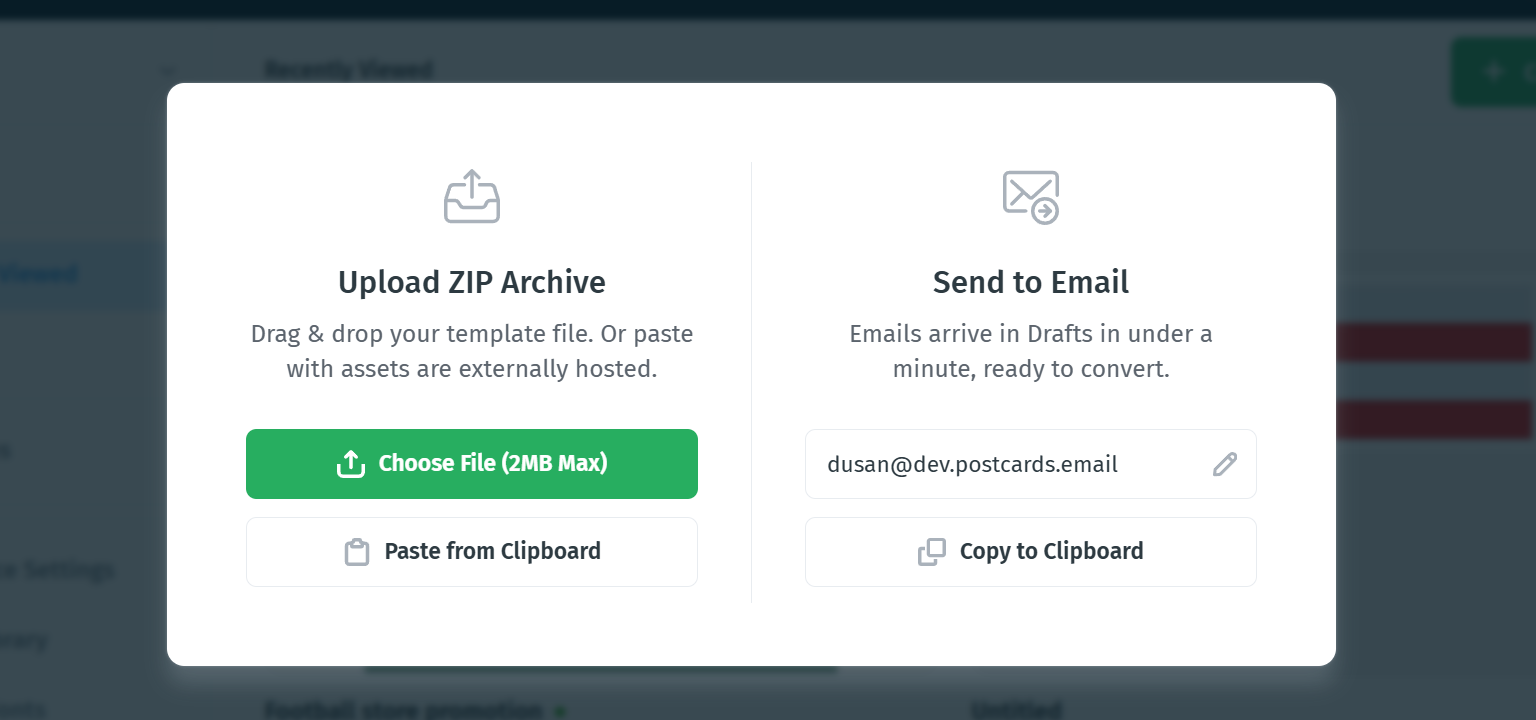
You can bring your email in three ways: upload a ZIP archive or HTML file, paste it from your clipboard, or send it to your personal import address by email.
Who Can Use Import HTML
Import HTML is available on all plans, including the free Start plan:
- Start (free) — up to 5 completed imports per month, with the Basic model only. Choosing Ultra shows an upgrade prompt.
- Lite, Plus, and Pro — both Basic and Ultra models. See Credits and Pricing for monthly quotas.
The Viewer role can't run imports, and can't use Send to Email.
How to Import an HTML Email
1. Start an import
You can open Import HTML from two places:
- Inside the editor — click the arrow next to your project name to open the Project Menu, then choose Create New Project → Import HTML.

- From the dashboard — click the + Create button (top-right) and choose Import HTML. (Your dashboard is at designmodo.com/postcards/app/.)

2. Add your HTML
There are two ways to bring in your email:
- Upload a file — a single
.html/.htmfile, or a ZIP archive containing the HTML plus its images and assets. Maximum one file, up to 2 MB. In a ZIP, Postcards automatically detects the main file (it prefers anindex.html).

- Paste from your clipboard — copy your HTML code and paste it in with Cmd/Ctrl + V.

- Send to Email — send the email to your personal import address, and it lands in your project list as a draft. See Importing an Email by Sending It to Postcards below.
When you upload or paste, Postcards names the project after the email's <title>. Emails you send to your import address are named after the email subject instead. In all cases, ESP merge tags (like *|MC:SUBJECT|* or {{ subject }} ) are stripped out during conversion.
3. Choose a model
Postcards shows two conversion models — Basic and Ultra — with a live preview of your source email alongside them. Each model card shows an estimated credit cost (✦N) that updates in real time based on your template's size and complexity.

- Basic — Fast conversion, good for most templates. Start here.
- Ultra — Best fidelity, strict rule-following. Recommended for complex or pixel-perfect templates.
Note: If your file is larger than 102 KB, you'll see a warning that the email may be clipped in Gmail. See Tips to reduce email size.
4. Review the conversion
Once you choose Basic or Ultra, Postcards starts converting your email; wait a few moments for the generation to finish. It shows a side-by-side comparison: your original on the left, and the converted result on the right, filling in as it generates.
Note: The estimated cost is charged when the conversion starts, and cancelling doesn't refund it — but you keep whatever preview was generated, and you can still accept it and open it in the editor. Credits are only returned automatically if the conversion fails on our end.
While it's still generating, you can stop it at any point by clicking Cancel Import in the top-right corner.
Once the conversion finishes, you can:
- Toggle between desktop and mobile views
- Retry the conversion
- Try Ultra (or Try Basic) — re-run the same source through the other model, without re-uploading
- Accept & Open Editor when you're happy with the result

5. Import assets and open
If your converted template references external images or fonts, Postcards shows a Remote Assets Found dialog listing them. You have two choices:
- Add to Image Library — import the assets into your Postcards library so they're hosted by Postcards.
- Keep Remote URLs — leave the assets pointing to their original external locations.

Tip: Add to Image Library is the safer choice; if the original URLs ever go down or move, your images won't break. It's also consistent with hosting your images online for reliable rendering across email clients.
Once you accept, the project opens in the editor, fully editable.

After opening, you can give a quick 👍 / 👎 with an optional comment to help improve the feature.
Importing an Email by Sending It to Postcards
With Send to Email, you import an email simply by sending it to your personal import address. It's the fastest way to move templates out of another builder or ESP — no downloading or copying code.
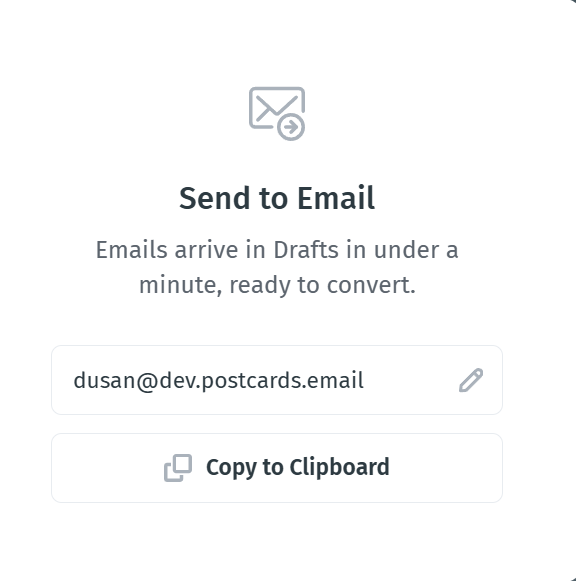
Your import address
Every team member gets their own personal import address for each team, for example, name@postcards.email. The address doesn't expire.
To find it, open Import HTML and choose Send to Email. Click Copy to Clipboard to copy the address.
Renaming your address
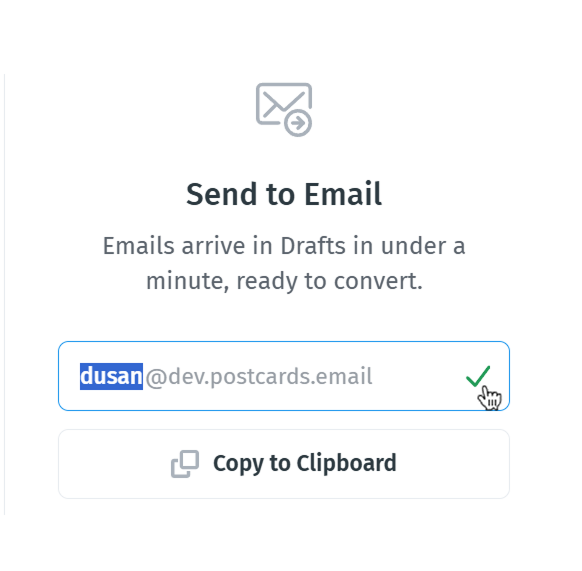
- Click the pencil icon next to your address.
- Type the new name.
- Confirm with the check mark or press Enter.
The new name must follow these rules:
- Only lowercase letters, numbers,
-, and_are allowed. - It can't start or end with
-or_. - Offensive words aren't allowed.
- It must not already be taken.
After renaming, you'll need to wait about 1 minute before you can rename it again.
Important: Once you rename your address, emails sent to the old address are ignored. Update the address anywhere you've saved it.
What happens when your email arrives
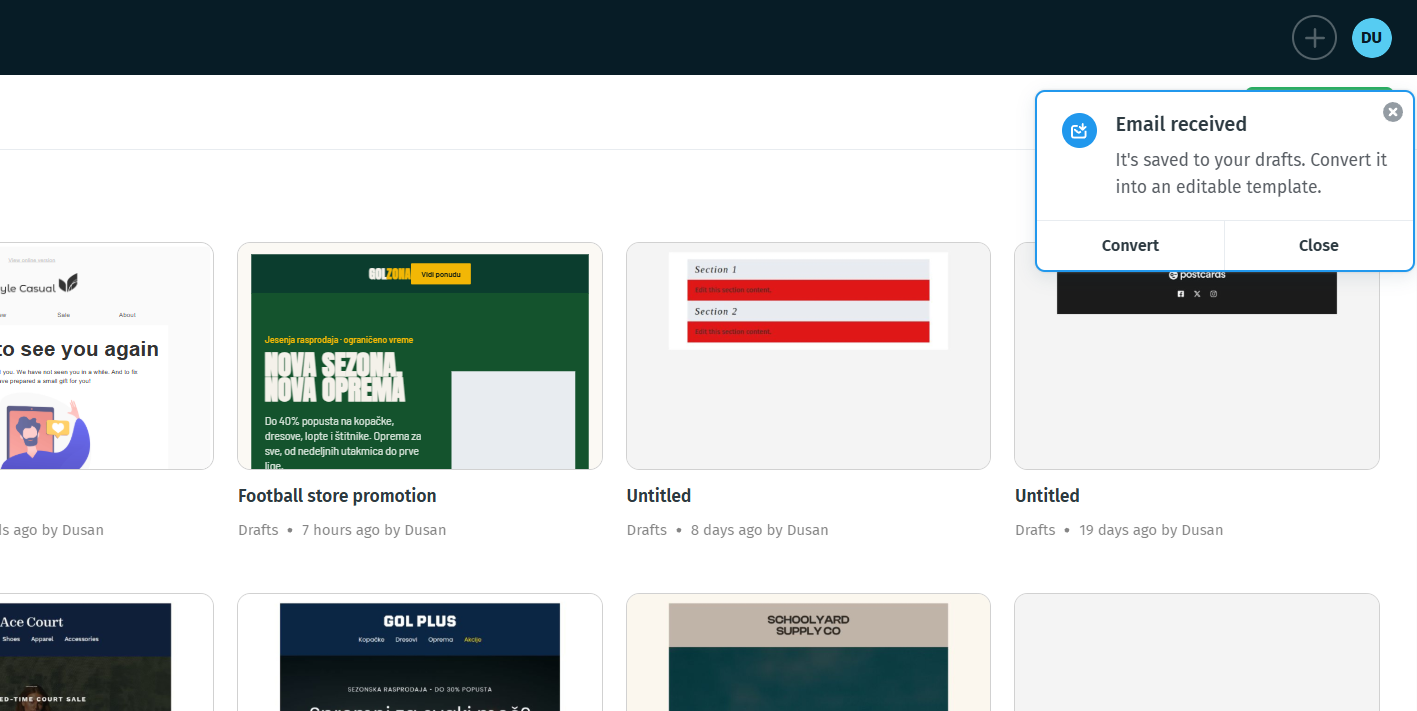
Each email you send becomes its own draft project in your project list, under Drafts. The project is named after the email subject.
An Email received notification appears in the top-right corner of any open Postcards tab, with two buttons:
- Convert — opens Choose a model so you can start the conversion right away.
- Close — dismisses the notification and keeps the draft for later.
The draft can't be edited until it's converted. To convert it later, open the draft's context menu in the project list and choose Continue Import. From there, the flow is the same as any other import: choose Basic or Ultra, review the result, then click Accept & Open Editor.
Receiving an email is free. Your monthly imports and credits are only used once you start the conversion.
When an email isn't imported
Some emails are dropped silently — you won't see an error, and no draft is created. This happens when:
- Your import address isn't the first "To" recipient (for example, it's in Cc, or listed as the 2nd or 3rd recipient).
- The email is very large (around 15 MB or more).
- The email has no HTML body (plain text only).
- The email was sent to an old address after you renamed it.
If your draft doesn't show up, check these first and send the email again.
Tip: send directly, don't forward
For the cleanest results, send the email straight from your old builder or ESP (Stripo, Beefree, Mailchimp, etc.) using its "send test" option, instead of forwarding it from your inbox.
Forwarding adds wrappers from your email client, like "Forwarded message" and the From/To/Date header. Postcards tries to strip these out, but they're the most common cause of messy conversions.
Team visibility
- Drafts that arrive at any member's address are visible to the whole team.
- Only you can see and rename your own import address.
- The Viewer role can't use Send to Email.
Basic vs. Ultra: Which to Use
Both models follow the same steps — the difference is accuracy and cost.
- Start with Basic. It's fast, cheaper, and handles most templates well.
- Switch to Ultra if the result isn't accurate enough, or if your template is complex or needs to be pixel-perfect. Ultra follows the conversion rules more strictly and reproduces intricate layouts more faithfully.
You don't need to re-upload to compare; the Try Ultra / Try Basic button on the comparison screen re-runs the same source through the other model.
Tip: Ultra costs more than Basic, and the gap grows with template size; large emails are noticeably more expensive in Ultra. For big templates, try Basic first and only reach for Ultra if you need the extra fidelity.
Credits and Pricing
Import HTML runs on AI credits, and the cost is dynamic — it depends on your HTML's size and complexity, and the estimate is shown up front on the model card before you convert.
Basic includes a set number of free imports each month, depending on your plan. For details on plan-specific limits, visit the Postcards pricing page.
Your free imports reset on your billing date. Once you've used them up, Basic imports are charged in credits based on the estimate. Ultra is always charged in credits — the free quota doesn't apply.
The full estimated cost is charged up front when conversion starts. A genuine failure refunds automatically; cancelling does not (you keep the generated preview and can still accept it).
For how AI credits and plans work, see Understanding AI Credits.
What Happens to Your Code
To make conversion faster and cheaper, Postcards cleans up your HTML before sending it to the AI:
- HTML comments, legacy Microsoft Office/Outlook tags, and 1×1 tracking pixels are removed.
- For emails sent to your import address, forwarding wrappers (like "Forwarded message" and From/To/Date headers) are stripped where possible.
For fonts:
- Google Fonts are added automatically — no action needed.
- Other external fonts (
@font-facefrom non-Google sources) are detected and offered for import into your font library.
Limits
- Upload: up to 2 MB, one file at a time.
- Send to Email: emails larger than about 15 MB aren't imported. Your import address must be the first "To" recipient, and the email must have an HTML body.
- Plan project limits apply. An import counts as a project, so your plan's project cap applies (for example, Free — 10, Lite — 100).
Resuming an Import
If you leave in the middle of an import, it isn't lost — reopen the project, and Postcards restores the conversion screen so you can pick up where you left off.
Unfinished imports are easy to spot in your project list. Their cards show a live thumbnail of the email and a warning icon; hover over it to see the "import not finished" tooltip.
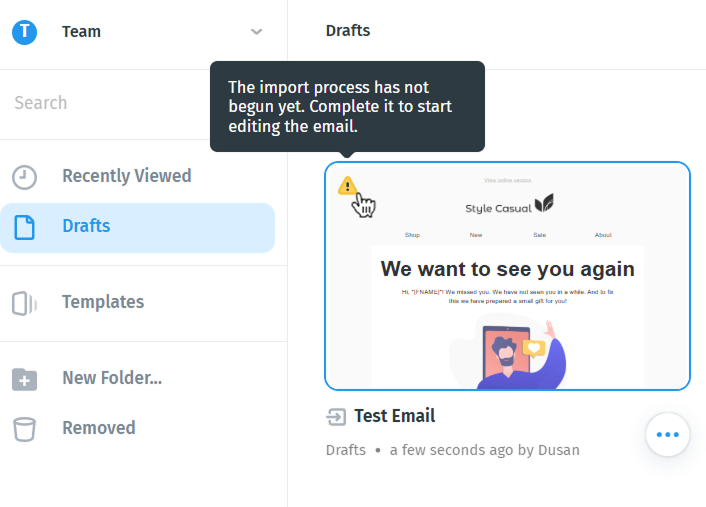
Open the card's context menu to continue:
- Continue Import — for drafts still waiting for you to choose a model (for example, emails you sent to your import address).
- View Import Progress — for conversions that are still running.
Related Articles
- Understanding AI Credits — how credits, plans, and packs work
- Creating and Managing Workspaces in Postcards — plans and billing
- Postcards Projects — managing your imported projects