Postcards Projects
The Projects screen is the central hub for managing all your email design projects in Postcards. It’s where you can organize, search, and collaborate on projects, create folders, and restore previous versions, all from a clean, intuitive interface.
Accessing the Projects
You can access the Projects screen directly from the Postcards app home screen:
- Go to designmodo.com/postcards/app/.
- Sign in to your Designmodo account.
- You’ll land on the Projects screen, displaying your recently viewed projects, folders, and quick actions.

On the left sidebar, you’ll find:
- Recently Viewed: Shows your most recently opened projects. (Each team member may see a different list here, depending on which projects they’ve personally accessed)
- Drafts: Your complete list of projects.
- Templates: Pre-made designs available for use.
- New Folder: Create folders to organize projects.
- Removed: Recently deleted projects that can be restored.
- Invite a Teammate: Manage team collaboration and sharing.
- Image Library: Browse and manage uploaded images.
- Chat with Us: Contact Designmodo Support directly.
Project Management Actions
Each project card includes a thumbnail preview along with key project details such as:
- Date Viewed
- Date Edited
- Date Created
- Author
Each project card includes a ··· (three-dot) menu located on the right side. You can click this menu to access project options such as rename, duplicate, restore, or delete. Alternatively, you can right-click a specific project to open the same options menu directly.

1. Rename
Click Rename to change the project title. Enter a new name and press Enter.
2. Duplicate
Click Duplicate to make an exact copy of the project. The copy will appear immediately in your list with “Copy” appended to the name. This is useful for creating project variations or keeping a backup before major edits.
3. Restore (Version History)
When selecting Restore, it lets you access previous save states of that project (e.g., "2025-10-15 19:39") representing auto-saved versions.
- Choose a timestamp to roll back the project to that exact state.

This is especially helpful if you need to recover a previous version or undo recent changes.
4. Delete
Selecting Delete moves the project to the Removed section. Deleted projects remain recoverable until you manually clear them.
Creating and Organizing Projects
Create a New Project
Click Create New Project at the top of the dashboard to start a new email design. This opens the Postcards editor, where you can begin building your template.
Create a Folder
Click New Folder… in the sidebar to create a folder for grouping related projects. Once created, you can:
- Drag and drop projects directly into the folder to organize them.
- You can rename or delete folders by right-clicking the folder and choosing the desired action from the context menu.

Folders also support Subfolders, so you can nest your organization as deep as you need.
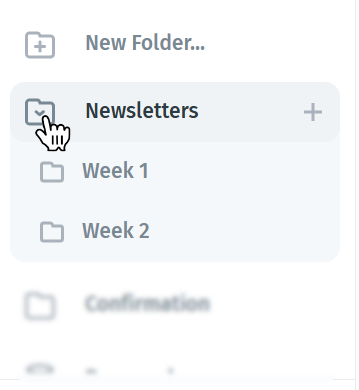
To create a subfolder, click the + button that appears next to a folder's name in the sidebar, give it a name and it will be created inside that folder. Alternatively, you can right-click any folder and select Create New Subfolder from the context menu.
Clicking the folder icon to the left of a top-level folder's name will collapse or expand its subfolders, keeping the sidebar tidy when you're not actively working inside it.
You can also reorganize folders freely by clicking and dragging them to a new position in the sidebar.
If you want to turn an existing folder into a subfolder of another, simply drag it onto the target folder and it will be nested inside it. You can also drag it back out at any time to make it a top-level folder again.

From there, you can drag projects directly into any subfolder to keep everything grouped exactly the way you want.
Sorting and Filtering Projects
At the top of your dashboard, you can sort projects by clicking on column headers:
- Project: sorts alphabetically.
- Date Viewed: most recently accessed projects first.
- Date Edited: projects sorted by last modification.
- Date Created: chronological order.
- Author: useful in team environments.
You can also toggle between Grid View and List View using the icons on the upper-right corner of the screen:
- Grid View displays large thumbnails for visual browsing.
- List View shows a more compact table format with detailed metadata.

The Removed Section
Deleted projects are stored temporarily in the Removed section, accessible from the sidebar. They remain there for 30 days, allowing users to restore them at any time during that period. After 30 days, projects are permanently deleted from the system along with any associated hosted assets.
To restore a project, simply click the ··· (three-dot) menu next to it and select Restore; the project will immediately return to your main dashboard. You can also choose Delete Forever from the same menu to permanently remove it.

Think of the Removed section as your project recycle bin, where you can safely recover or permanently clear deleted work.
Collaboration Indicators
When multiple teammates are active on the same project:
- The collaborator’s avatar icon appears over the project thumbnail.
- A small green dot may show active editing status.
This helps identify who is currently working on a project to avoid overwriting each other’s changes.
Search Function
Use the Search bar at the top of the sidebar to quickly locate projects by name or keyword. Results update dynamically as you type, making it easy to find specific designs among large project lists.

Tips and Best Practices
- Use Folders Strategically: Create folders by client, campaign, or season for better organization.
- Rename Projects Clearly: Add dates or client tags to keep project names meaningful.
- Duplicate Before Major Edits: Use the duplicate function as a quick safeguard before testing design changes.
- Regularly Clean the Removed Section: Keep your dashboard uncluttered by permanently deleting old or unused projects.
- Collaborate with Teammates: Use the Invite a Teammate feature to share access and manage roles efficiently.
Summary
The Projects screen brings together everything you need to organize and manage your Postcards workflow:
- Centralized access to all projects and folders
- Version history and restore functionality
- Sorting, searching, and collaboration tools
- Clean visual controls for list or grid viewing
It’s designed to help you manage projects faster, stay organized, and collaborate seamlessly.