This article will show you how to add tabular data to your Startup template.
Adding a Table

An HTML table is defined with the <table> tag. Each table row is defined with the <tr> tag, a table header is defined with the <th> tag and a table data/cell is defined with the <td> tag. You can use <thead> to group a table’s header content, <tbody> to group a table’s body content and <tfoot> to group a table’s footer content.
The code below adds the table shown above to the Startup template. We’ve placed the table inside a container that we’ve sized and positioned using some pre-defined classes. Check our classes guide for an explanation of what the classes do. The table has a class of table which a Bootstrap class that adds styles to the table.
<section class="pt-105 pb-45">
  <div class="container px-xl-0">
    <div class="row justify-content-center">
      <div class="col-xl-8 col-lg-10">
        <table class="table">
          <thead>
            <tr>
              <th scope="col">#</th>
              <th scope="col">First Name</th>
              <th scope="col">Last Name</th>
              <th scope="col">Email</th>
            </tr>
          </thead>
          <tbody>
            <tr>
              <th scope="row">1</th>
              <td>Cruella</td>
              <td>De Vil</td>
              <td>deVil@furs_r_us.com</td>
            </tr>
            <tr>
              <th scope="row">2</th>
              <td>Tom</td>
              <td>Riddle</td>
              <td>i.am.lord@voldemort.com</td>
            </tr>
            <tr>
              <th scope="row">3</th>
              <td>Sheev</td>
              <td>Palpatine</td>
              <td>darth@sidious.me</td>
            </tr>
            <tr>
              <th scope="row">4</th>
              <td>Anakin</td>
              <td>Skywalker</td>
              <td>dv@mail.com</td>
            </tr>
          </tbody>
        </table>
      </div>
    </div>
  </div>
</section>
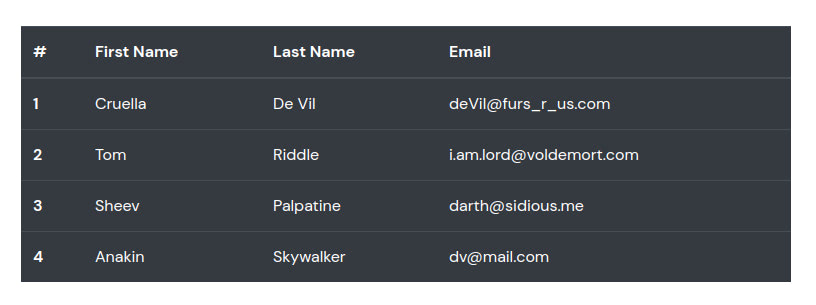
You can make the table have a dark background by adding the table-dark class to it.
<section class="pt-105 pb-45">
  <div class="container px-xl-0">
    <div class="row justify-content-center">
      <div class="col-xl-8 col-lg-10">
        <table class="table table-dark">
          <thead>
            <tr>
              <th scope="col">#</th>
              <th scope="col">First Name</th>
              <th scope="col">Last Name</th>
              <th scope="col">Email</th>
            </tr>
          </thead>
          <tbody>
            <tr>
              <th scope="row">1</th>
              <td>Cruella</td>
              <td>De Vil</td>
              <td>deVil@furs_r_us.com</td>
            </tr>
            <tr>
              <th scope="row">2</th>
              <td>Tom</td>
              <td>Riddle</td>
              <td>i.am.lord@voldemort.com</td>
            </tr>
            <tr>
              <th scope="row">3</th>
              <td>Sheev</td>
              <td>Palpatine</td>
              <td>darth@sidious.me</td>
            </tr>
            <tr>
              <th scope="row">4</th>
              <td>Anakin</td>
              <td>Skywalker</td>
              <td>dv@mail.com</td>
            </tr>
          </tbody>
        </table>
      </div>
    </div>
  </div>
</section>
Adding Color to the Table Head
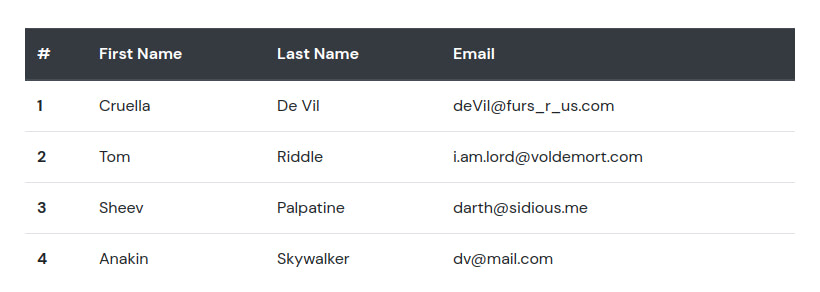
You can make the table’s head more distinguishable from the body by adding some color to it. Use the thead-dark class for a dark table head.
<section class="pt-105 pb-45">
  <div class="container px-xl-0">
    <div class="row justify-content-center">
      <div class="col-xl-8 col-lg-10">
        <table class="table">
          <thead class="thead-dark">
            <tr>
              <th scope="col">#</th>
              <th scope="col">First Name</th>
              <th scope="col">Last Name</th>
              <th scope="col">Email</th>
            </tr>
          </thead>
          <tbody>
            <tr>
              <th scope="row">1</th>
              <td>Cruella</td>
              <td>De Vil</td>
              <td>deVil@furs_r_us.com</td>
            </tr>
            <tr>
              <th scope="row">2</th>
              <td>Tom</td>
              <td>Riddle</td>
              <td>i.am.lord@voldemort.com</td>
            </tr>
            <tr>
              <th scope="row">3</th>
              <td>Sheev</td>
              <td>Palpatine</td>
              <td>darth@sidious.me</td>
            </tr>
            <tr>
              <th scope="row">4</th>
              <td>Anakin</td>
              <td>Skywalker</td>
              <td>dv@mail.com</td>
            </tr>
          </tbody>
        </table>
      </div>
    </div>
  </div>
</section>
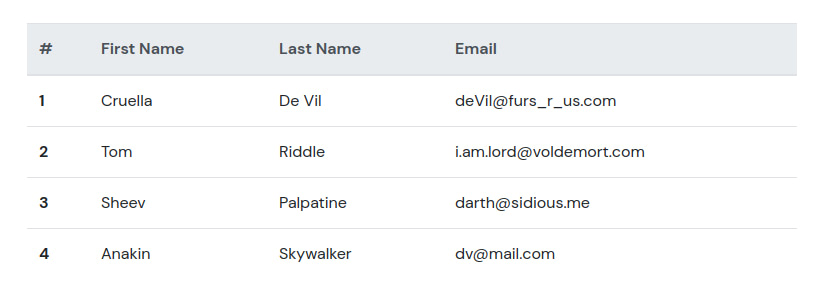
And thead-light class for a lighter table head.
<section class="pt-105 pb-45">
  <div class="container px-xl-0">
    <div class="row justify-content-center">
      <div class="col-xl-8 col-lg-10">
        <table class="table">
          <thead class="thead-light">
            <tr>
              <th scope="col">#</th>
              <th scope="col">First Name</th>
              <th scope="col">Last Name</th>
              <th scope="col">Email</th>
            </tr>
          </thead>
          <tbody>
            <tr>
              <th scope="row">1</th>
              <td>Cruella</td>
              <td>De Vil</td>
              <td>deVil@furs_r_us.com</td>
            </tr>
            <tr>
              <th scope="row">2</th>
              <td>Tom</td>
              <td>Riddle</td>
              <td>i.am.lord@voldemort.com</td>
            </tr>
            <tr>
              <th scope="row">3</th>
              <td>Sheev</td>
              <td>Palpatine</td>
              <td>darth@sidious.me</td>
            </tr>
            <tr>
              <th scope="row">4</th>
              <td>Anakin</td>
              <td>Skywalker</td>
              <td>dv@mail.com</td>
            </tr>
          </tbody>
        </table>
      </div>
    </div>
  </div>
</section>
Creating Tables With Striped Rows
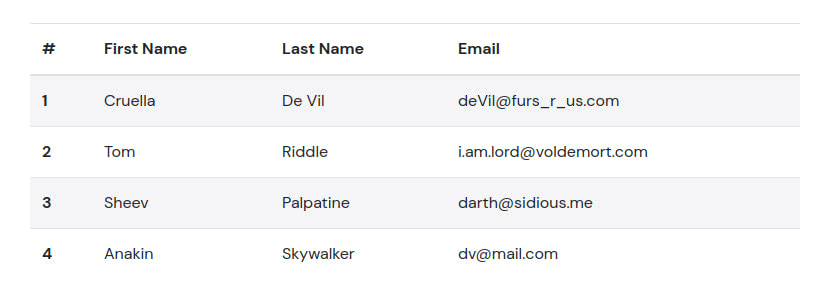
Zebra-striping the rows of a table makes tables easier to skim through. Add the table-striped class to your table to activate this.
<section class="pt-105 pb-45">
  <div class="container px-xl-0">
    <div class="row justify-content-center">
      <div class="col-xl-8 col-lg-10">
        <table class="table table-striped">
          <thead>
            <tr>
              <th scope="col">#</th>
              <th scope="col">First Name</th>
              <th scope="col">Last Name</th>
              <th scope="col">Email</th>
            </tr>
          </thead>
          <tbody>
            <tr>
              <th scope="row">1</th>
              <td>Cruella</td>
              <td>De Vil</td>
              <td>deVil@furs_r_us.com</td>
            </tr>
            <tr>
              <th scope="row">2</th>
              <td>Tom</td>
              <td>Riddle</td>
              <td>i.am.lord@voldemort.com</td>
            </tr>
            <tr>
              <th scope="row">3</th>
              <td>Sheev</td>
              <td>Palpatine</td>
              <td>darth@sidious.me</td>
            </tr>
            <tr>
              <th scope="row">4</th>
              <td>Anakin</td>
              <td>Skywalker</td>
              <td>dv@mail.com</td>
            </tr>
          </tbody>
        </table>
      </div>
    </div>
  </div>
</section>
Adding Borders to Your Table
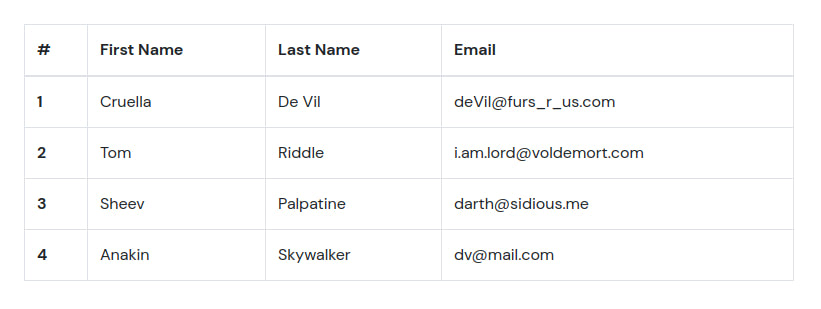
Add the table-bordered class for a bordered table.
<section class="pt-105 pb-45">
  <div class="container px-xl-0">
    <div class="row justify-content-center">
      <div class="col-xl-8 col-lg-10">
        <table class="table table-bordered">
          <thead>
            <tr>
              <th scope="col">#</th>
              <th scope="col">First Name</th>
              <th scope="col">Last Name</th>
              <th scope="col">Email</th>
            </tr>
          </thead>
          <tbody>
            <tr>
              <th scope="row">1</th>
              <td>Cruella</td>
              <td>De Vil</td>
              <td>deVil@furs_r_us.com</td>
            </tr>
            <tr>
              <th scope="row">2</th>
              <td>Tom</td>
              <td>Riddle</td>
              <td>i.am.lord@voldemort.com</td>
            </tr>
            <tr>
              <th scope="row">3</th>
              <td>Sheev</td>
              <td>Palpatine</td>
              <td>darth@sidious.me</td>
            </tr>
            <tr>
              <th scope="row">4</th>
              <td>Anakin</td>
              <td>Skywalker</td>
              <td>dv@mail.com</td>
            </tr>
          </tbody>
        </table>
      </div>
    </div>
  </div>
</section>
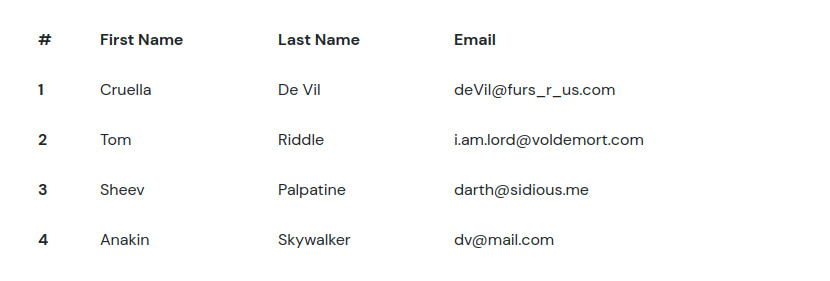
And the table-borderless class for a borderless table.
<section class="pt-105 pb-45">
  <div class="container px-xl-0">
    <div class="row justify-content-center">
      <div class="col-xl-8 col-lg-10">
        <table class="table table-borderless">
          <thead>
            <tr>
              <th scope="col">#</th>
              <th scope="col">First Name</th>
              <th scope="col">Last Name</th>
              <th scope="col">Email</th>
            </tr>
          </thead>
          <tbody>
            <tr>
              <th scope="row">1</th>
              <td>Cruella</td>
              <td>De Vil</td>
              <td>deVil@furs_r_us.com</td>
            </tr>
            <tr>
              <th scope="row">2</th>
              <td>Tom</td>
              <td>Riddle</td>
              <td>i.am.lord@voldemort.com</td>
            </tr>
            <tr>
              <th scope="row">3</th>
              <td>Sheev</td>
              <td>Palpatine</td>
              <td>darth@sidious.me</td>
            </tr>
            <tr>
              <th scope="row">4</th>
              <td>Anakin</td>
              <td>Skywalker</td>
              <td>dv@mail.com</td>
            </tr>
          </tbody>
        </table>
      </div>
    </div>
  </div>
</section>
Highlighting Table Rows on Hover
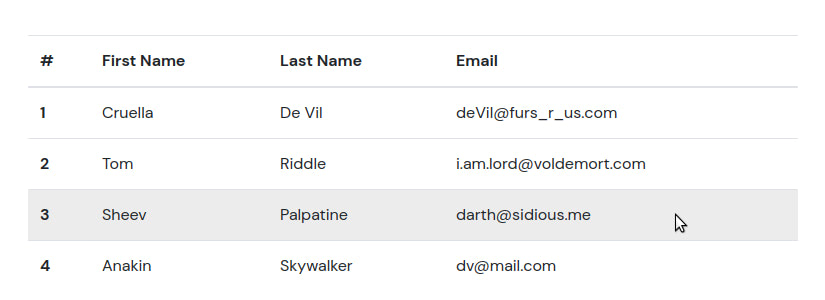
If you add the table-hover class to a table, a row will be highlighted when the user hovers their mouse over it.
<section class="pt-105 pb-45">
  <div class="container px-xl-0">
    <div class="row justify-content-center">
      <div class="col-xl-8 col-lg-10">
        <table class="table table-hover">
          <thead>
            <tr>
              <th scope="col">#</th>
              <th scope="col">First Name</th>
              <th scope="col">Last Name</th>
              <th scope="col">Email</th>
            </tr>
          </thead>
          <tbody>
            <tr>
              <th scope="row">1</th>
              <td>Cruella</td>
              <td>De Vil</td>
              <td>deVil@furs_r_us.com</td>
            </tr>
            <tr>
              <th scope="row">2</th>
              <td>Tom</td>
              <td>Riddle</td>
              <td>i.am.lord@voldemort.com</td>
            </tr>
            <tr>
              <th scope="row">3</th>
              <td>Sheev</td>
              <td>Palpatine</td>
              <td>darth@sidious.me</td>
            </tr>
            <tr>
              <th scope="row">4</th>
              <td>Anakin</td>
              <td>Skywalker</td>
              <td>dv@mail.com</td>
            </tr>
          </tbody>
        </table>
      </div>
    </div>
  </div>
</section>
Adding Captions to Tables
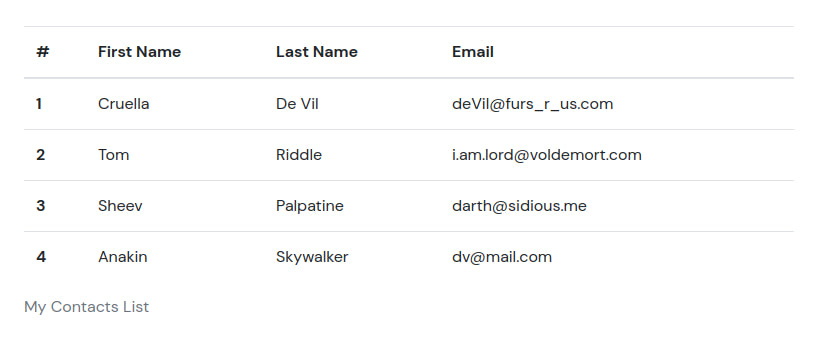
You might want to give more information describing the table’s data. You can do this by adding a caption at the bottom of the table as shown above. To add a caption, place your text inside a <caption> tag.
<section class="pt-105 pb-45">
  <div class="container px-xl-0">
    <div class="row justify-content-center">
      <div class="col-xl-8 col-lg-10">
        <table class="table">
          <caption>My Contacts List</caption>
          <thead>
            <tr>
              <th scope="col">#</th>
              <th scope="col">First Name</th>
              <th scope="col">Last Name</th>
              <th scope="col">Email</th>
            </tr>
          </thead>
          <tbody>
            <tr>
              <th scope="row">1</th>
              <td>Cruella</td>
              <td>De Vil</td>
              <td>deVil@furs_r_us.com</td>
            </tr>
            <tr>
              <th scope="row">2</th>
              <td>Tom</td>
              <td>Riddle</td>
              <td>i.am.lord@voldemort.com</td>
            </tr>
            <tr>
              <th scope="row">3</th>
              <td>Sheev</td>
              <td>Palpatine</td>
              <td>darth@sidious.me</td>
            </tr>
            <tr>
              <th scope="row">4</th>
              <td>Anakin</td>
              <td>Skywalker</td>
              <td>dv@mail.com</td>
            </tr>
          </tbody>
        </table>
      </div>
    </div>
  </div>
</section>
Making Your Table Responsive
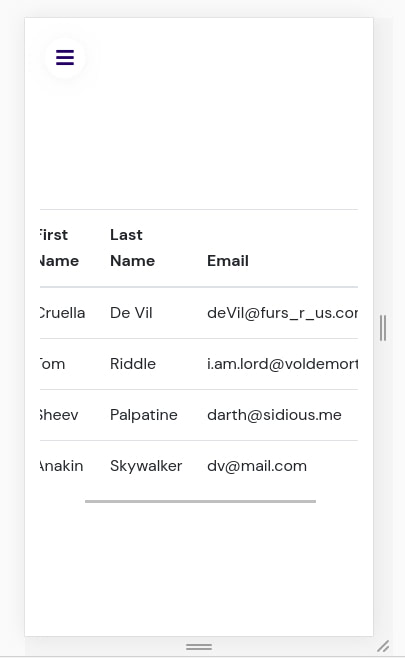
Responsive tables allow tables to be scrolled horizontally when viewed on smaller sized devices instead of the data being too squeezed (you can see the scrollbar above). You can make a table responsive across all viewports by wrapping it in a div with the table-responsive class. You can also specifically choose a maximum breakpoint with which to have the horizontally scrolled table by using .table-responsive{-sm|-md|-lg|-xl}. Below, we use table-responsive-sm to specify that the horizontally scrolled table should only be activated on small devices.
<section class="pt-105 pb-45">
  <div class="container px-xl-0">
    <div class="row justify-content-center">
      <div class="col-xl-8 col-lg-10">
        <div class="table-responsive-sm">
          <table class="table">
            <thead>
              <tr>
                <th scope="col">#</th>
                <th scope="col">First Name</th>
                <th scope="col">Last Name</th>
                <th scope="col">Email</th>
              </tr>
            </thead>
            <tbody>
              <tr>
                <th scope="row">1</th>
                <td>Cruella</td>
                <td>De Vil</td>
                <td>deVil@furs_r_us.com</td>
              </tr>
              <tr>
                <th scope="row">2</th>
                <td>Tom</td>
                <td>Riddle</td>
                <td>i.am.lord@voldemort.com</td>
              </tr>
              <tr>
                <th scope="row">3</th>
                <td>Sheev</td>
                <td>Palpatine</td>
                <td>darth@sidious.me</td>
              </tr>
              <tr>
                <th scope="row">4</th>
                <td>Anakin</td>
                <td>Skywalker</td>
                <td>dv@mail.com</td>
              </tr>
            </tbody>
          </table>
        </div>
      </div>
    </div>
  </div>
</section>