The Startup template comes with some placeholder images stored in a folder labeled i. You should replace the images and customize them to your brand.
This guide will show you how.
Change Images
If you take a look at the “i” folder in your downloaded project, you’ll notice that the images come in pairs, e.g. content_5_bg.jpg (which is 1400 by 540 pixels large) and content_5_bg@2x.jpg (2800px X 1080px). Startup uses 2 versions of images—regular and 2x for high-resolution retina displays. Keep this in mind when adding your own images.
Though optional, it is recommended that you provide a regular and 2x version for every image added. If your template only has the lower resolution “regular” image, it will look great on lower resolution devices, but blurry on high-resolution retina devices. If you only use a high resolution “2x version”, then the image will look great on all devices, but the disadvantage of this is the unnecessary bandwidth usage that users using low-resolution devices have to go through downloading the high-res image when a low resolution one would have sufficed. You should always try to keep your website lean for better load speeds and user experience.
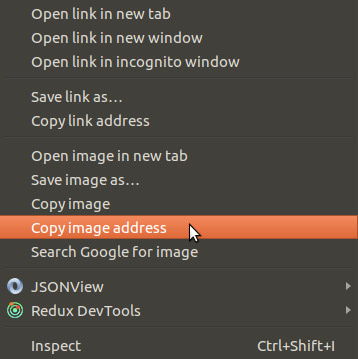
To change an image, first ensure that you are targeting the right image. The easiest way to do this is to open the index.html file in a browser, locate the image you want to change, right-click on it and select Copy image address (for Chrome and Safari) or Copy Image Location (for Mozilla Firefox) from the list of options.

Paste the address somewhere and you should be able to see the image’s name.
file:///home/janedoe/path/to/startup3_template/i/showcase_1_img_1.jpg
To change the image, search for the name in the index.html file. Most text/code editors have a quick-search feature that you can use to search a file for a string of text. The keyboard shortcut to this is usually Ctr+F (Cmd+F on macOS). On locating the image in the code, modify the src and srcset attributes with the new image name:
<img src="i/new_image.jpg" srcset="i/new_image@2x.jpg 2x" alt="" />
If you only want to include one version of an image, then don’t include the srcset attribute:
<img src="i/new_image.jpg" alt="" />
Though optional, it is recommended that you include some alternate text for the image via the alt attribute. The alt attribute provides alternative information for an image if a user for some reason cannot view it (because of slow connection, an error in the src attribute, or if the user is using a screen reader). It can also positively impact your page’s search engine ranking.
Background Images

Some images, like the one shown above, aren’t added to the page via the image tag (img). They are added to the page as a background image of another element.
To locate a background image that you want changed, you can’t follow the same procedure as we did in the previous section. Right-clicking on the image in a browser won’t give you an option to Copy image address because you aren’t really clicking on an HTML image, but another HTML tag.
To locate the image, you just have to look at the code in index.html and identify the section whose background image you want to change.
The section will have two background-image CSS styles applied to it linking to two versions of the image—regular and 2x for high-resolution retina displays. It is optional, but recommended, to also have two versions of the replacement image.
<!-- Header 8 -->

<header class="pt-245 pb-170 bg-dark color-filter-dark-5 header_8">
  <style>
    .header_8{background-image:url(i/header_8_bg.jpg);}
    @media(-webkit-min-device-pixel-ratio: 1.25), (min-resolution: 120dpi){
      .header_8{background-image:url(i/header_8_bg@2x.jpg);}
    }
  </style>

  ...

</header>

<!-- Content 5 -->

<section class="pt-120 pb-105 bg-dark color-filter-dark-5 content_5">
  <style>
    .content_5{background-image:url(i/content_5_bg.jpg);}
    @media(-webkit-min-device-pixel-ratio: 1.25), (min-resolution: 120dpi){
      .content_5{background-image:url(i/content_5_bg@2x.jpg);}
    }
  </style>

  ...

</section>
Change the background-image url with your new image.
<!-- Header 8 -->

<header class="pt-245 pb-170 bg-dark color-filter-dark-5 header_8">
  <style>
    .header_8{background-image:url(i/new_bg.jpg);}
    @media(-webkit-min-device-pixel-ratio: 1.25), (min-resolution: 120dpi){
      .header_8{background-image:url(i/new_bg@2x.jpg);}
    }
  </style>

  ...

</header>
If you’d rather use only one version, then leave out the second part:
<!-- Header 8 -->

<header class="pt-245 pb-170 bg-dark color-filter-dark-5 header_8">
  <style>
    .header_8{background-image:url(i/new_bg.jpg);}
  </style>

  ...

</header>
Refresh the page in the browser and you should see the new background.

Add Rounded Corners to Images

You might have an image in your template like the one shown above, which you want to style as the one shown below:

To make an image (or other elements) to have a circular shape, give it a radius_full class. This will set its border-radius CSS property to 50%, thus making it circular.
<img src="i/team_1_img_2.jpg" srcset="i/team_1_img_2@2x.jpg 2x" class="radius_full img-fluid" alt="" />
For an image to be perfectly circular, it has to have the same width and height, otherwise, it will be an oval.

The best thing is to do is to replace the image with one that has the same width and height:

You can also force the image’s width and height to be the same via CSS. We use the w-XX and h-XX classes to set the width and height of elements, respectively. XX is the value in pixels with a maximum value of 1170 and in 10px increments.
<img src="i/team_3_img_1.jpg" srcset="i/team_3_img_1@2x.jpg 2x" class="radius_full w-170 h-170 img-fluid" alt="" />
You’ll get a circle with this but the image might end up looking stretched as it won’t maintain its aspect ratio.

You might also want to just change how rounded the corners of an image are. To do this, edit its radiusXX class. This class sets border-radius:XXpx where XX is the value in pixels, ranging from 4-32 with 2px increments.
<!-- radius10 -->
<img src="i/team_3_img_1.jpg" srcset="i/team_3_img_1@2x.jpg 2x" class="radius10 img-fluid" alt="" />

<!-- radius24 -->
<img src="i/team_3_img_1.jpg" srcset="i/team_3_img_1@2x.jpg 2x" class="radius24 img-fluid" alt="" />

<!-- No radiusXX -->
<img src="i/team_3_img_1.jpg" srcset="i/team_3_img_1@2x.jpg 2x" class="img-fluid" alt="" />

Add Captions to Images
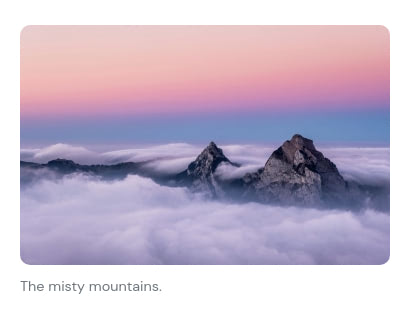
To add a caption to an image, place the image inside a figure tag.
<figure class="figure">
  <img src="i/showcase_1_img_3.jpg" srcset="i/showcase_1_img_3@2x.jpg 2x" class="figure-img img-fluid radius10" alt="" />
  <figcaption class="figure-caption">The misty mountains.</figcaption>
</figure>

Add Tooltips to Images
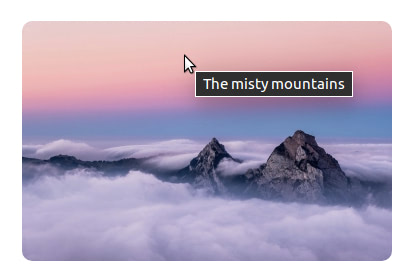
You might want to add a Tooltip to an image to provide more information when a user hovers on it. To do so, add a title attribute to the image.
<img src="i/showcase_1_img_3.jpg" srcset="i/showcase_1_img_3@2x.jpg 2x" class="img-fluid radius10" alt="" title="The misty mountains" />

Bootstrap provides further customizations that you can use on your Tooltips. Check the documentation for further information on this.
Image Thumbnails
You can add an img-thumbnail class to an image to give it a rounded 1px border appearance.
<img src="i/team_1_img_2.jpg" srcset="i/team_1_img_2@2x.jpg 2x" class="img-thumbnail img-fluid" alt="">

