You can specify the fonts you want to be used in your Startup template using the Startup app. After exporting the template’s code, you can still modify the fonts used. This guide will show you how.
We’ll start by looking at how to use two popular font libraries—Google Fonts and Adobe Fonts—before going through how to apply your selected font to your template. If you already have your selected font, you can skip to the section where we apply it to the template.
Using Google Fonts
After identifying a font that you want to use on Google Fonts, select it with the Select This Font button found at the top of the font’s page.
![]()
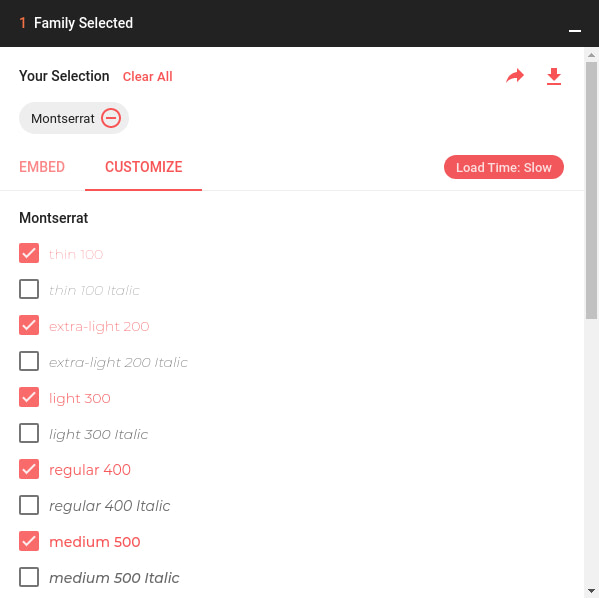
Expand the Family Selected menu at the bottom of the page and open the Customize tab. Here, you’ll specify the various weights and styles for your font. We use different font-weights in the Startup templates. It is best to match the font weights and styles used in your template. If you know the weights used in your template, then you can only select those, otherwise, select the non-italic weights ranging from 100 to 900.

You might run into a scenario where your selected font has fewer weights than those used in the template. It is best to match the font weights used in your template, but if you must use that font and it doesn’t have some weights, you can still use it. When the web browser encounters text that has been styled with an unavailable font weight, it will display that text with the closest available weight.
After specifying the font weights, go back to the Embed tab and copy the font’s URL from the Embed Font section.

You can now skip to the section where we’ll apply the font to the template.
Using Adobe Fonts (formerly Typekit)
If you are using Adobe Fonts, first identify the font you want to use and click the </> Add to Web Project button at the top of the font’s page to add it to a web project.
![]()
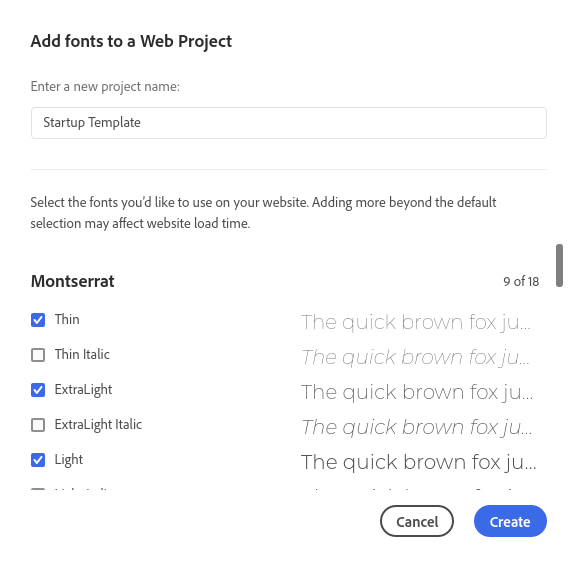
In the Add fonts to a Web Project window that appears, name your web project and select the various weights and styles for the font that you want to make available to your template. We use different font-weights in the Startup templates. It is best to match the font weights and styles used in your template. If you know the weights used in your template, then you can only select those, otherwise select the non-italic weights ranging from 100 to 900 (i.e. Thin, ExtraLight, Light, Regular, Medium, SemiBold, Bold, ExtraBold and Black).

You might run into a scenario where your selected font has fewer weights than those used in the template. It is best to match the font weights used in your template, but if you must use that font and it doesn’t have some weights, you can still use it. When the web browser encounters text that has been styled with an unavailable font-weight, it will display that text with the closest available weight.
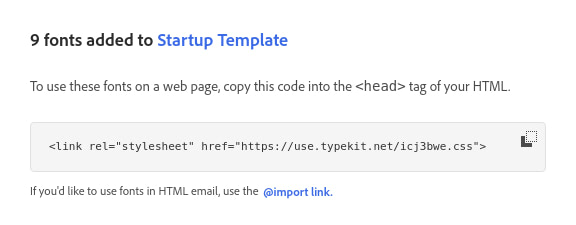
After selecting the various font weights and styles, click the Create button to create the web project and you’ll be shown a window with a link that you’ll use in the next section.

Apply the Font to Your Template
To change the fonts used in your template, you’ll have to make a few changes to the template’s HTML and CSS files. You can edit the files using any text editor, but we recommend using a code editor that offers features that will make it easier for you (for instance, the Find & Replace feature that we’ll soon use). Two free editors that you can use are VS Code and Atom.
Open the downloaded folder up in the code editor so that you can search through the whole project instead of just one file at a time.
The default template uses the same font—DM Sans—for the logo, headings and main content (the body). You can use several fonts on your website, but for good design, it is usually recommended to only use one or two fonts. This is why the Generator app only allows you to specify at most two fonts: for the Headings (which will also be used for the logo) and the Body.
You will find a link to the font used in the index.html file:
<link href="https://fonts.googleapis.com/css?family=DM+Sans:100,200,300,400,500,600,700,800,900" rel="stylesheet">
If you want to replace the current font, then replace its link with the link you copied from the font library.
<link href="https://fonts.googleapis.com/css?family=Montserrat:100,200,300,400,500,600,700,800,900&display=swap" rel="stylesheet">
Otherwise, if you want to use another font in addition to the font used in your template, then modify the link to include both fonts (if you are using Google Fonts):
<link href="https://fonts.googleapis.com/css?family=DM+Sans:100,200,300,400,500,600,700,800,900|Montserrat:100,200,300,400,500,600,700,800,900&display=swap" rel="stylesheet">
If you are using Adobe Fonts and would like to use the font from Adobe in addition to the font used in the template, then include both links in your file. You could also look for both fonts on Adobe Fonts and add both of them to a Web Project so that you’ll only have one font link in your HTML file.
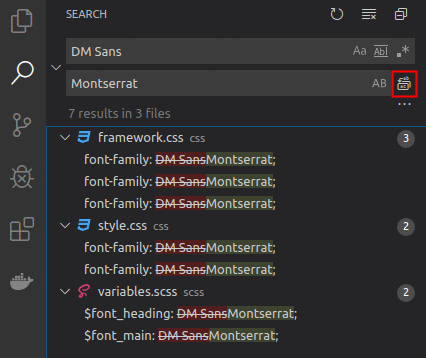
If you are going to use only one font in your template, then replacing the old font with the new one in your CSS files will be easy. You just have to replace all instances of the old font with the new one. Most code editors have a Find & Replace feature that will enable you to do this in one step. On both Atom and VS Code, you can open this with the keyboard shortcut Ctr+Shift+F (Cmd+Shift+F on macOS). Enter your new font and use the Replace All button to replace all occurrences of the old font name in all files in the project.
Atom:

VS Code:

If you want to use different fonts for your headings and body, check below for instructions.
Change the Heading and Logo Font
To only change the font used for headings and the logo, replace the old font in the /css/framework.css file:
.logo {
  font-family: DM Sans;
  font-size: 24px;
  color: #1E0E62;
  font-weight: 700;
}

.f-heading {
  font-family: DM Sans;
}
Also, replace the old font in the /css/style.css file:
h1, h2, h3, h4, h5, h6 {
  -webkit-margin-before: 0;
  -webkit-margin-after: 0;
  margin: 0;
  font-weight: 700;
  font-family: DM Sans;
}
Finally, make the change in the /scss/variables.scss file. This will only be used if you use SCSS, but you might as well make the change to keep things consistent and to avoid errors in case you switch to using SCSS in the future.
$font_heading: DM Sans;
Change the Body Font
To only change the font used in the body (main content) of your template, change the font used in /css/framework.css:
.f-main {
  font-family: DM Sans;
}
Then replace the old font in /css/style.css
body {
  font-family: DM Sans;
  font-weight: 400;
  font-size: 16px;
  line-height: 26px;
  color: #1E0E62;
  -webkit-font-smoothing: antialiased;
}
And finally make the change in /scss/variables.scss:
$font_main: DM Sans;