The Slides generator makes available a contact form that you can add to your website (Slide #55). The form sends data via AJAX to the ajax-email.php script that comes with the template. Configuring and customizing the form is simple as you’ll soon see.
Receiving Data from the Contact Form
By default, the contact form looks as shown below:
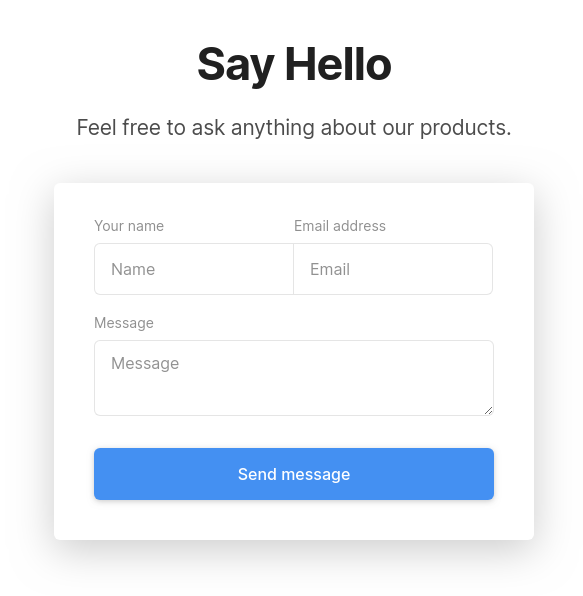
If you want a form that collects a name, email address and message, then you can use the form as is. If you want to customize the fields in the form, the next section covers this.
To receive data from the form, you need to add the recipient email address in the ajax-email.php file. You can also modify the subject if you wish. Note that the script will only work on a PHP server with SendMail installed, so you can’t test it out by opening the HTML file in your browser, the template files have to be hosted on a server.
/* SETTINGS */
$recipient = "your.email@gmail.com";
$subject = "New Message from Contact Form";
After wiring up the form, you should now be able to send messages to the recipient email address. After a message is successfully sent, the blue Send message button briefly turns green with a Done! message and then the form fields get cleared and the button goes back to its original state.
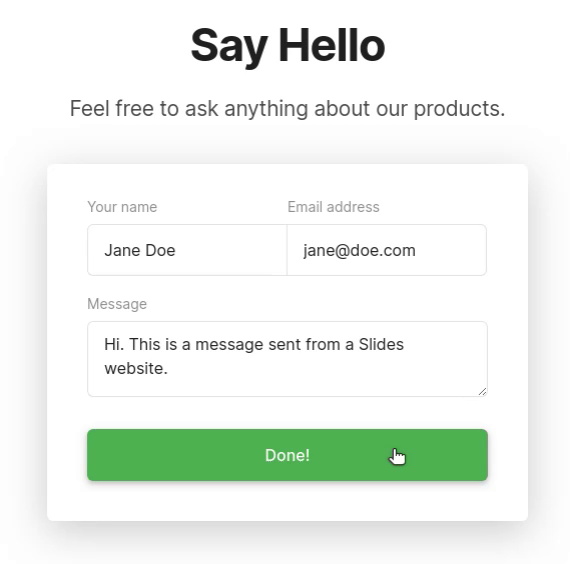
If you check your email, you should see the message sent.
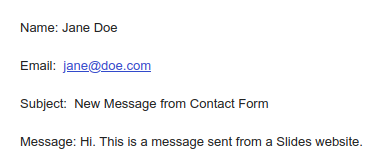
If your form isn’t working, two possible reasons are:
- You didn’t add your email in the
ajax-email.phpfile, which is located in the root folder. Also, check it for typos—you could have added the wrong email. - By default config, the server you’re using isn’t allowed to send emails. You can either ask the platform’s support staff to turn on the mail function or do it yourself using the admin panel.
Customizing the Contact Form
If you want to add or modify the fields in the form, you’ll have to make changes to the HTML and PHP files (and possibly to the CSS file).
Below is the code of the default form:
<!-- White Slide 8 (#55) -->
<section class="slide whiteSlide">
  <div class="content">
    <div class="container">
      <div class="wrap">
        <h1 class="smaller margin-bottom-2 ae-1">Say Hello</h1>
        <p class="large margin-bottom-4 ae-2"><span class="opacity-8">Feel free to ask anything about our products.</span></p>
        <div class="form-55 fix-5-12">
          <div class="pad padding-top-2 shadow left selected ae-3">
            <form action="ajax-email.php" id="contact-form" method="post" class="slides-form wide" data-ajax-form="true">
              <ul class="flex noSpaces">
                <li class="col-6-12 form-55-input-1">
                  <div class="label ae-5"><label class="left opacity-5" for="name55">Your name</label></div>
                  <input class="rounded wide ae-6" id="name55" type="name" name="name" placeholder="Name" required>
                </li>
                <li class="col-6-12 form-55-input-2">
                  <div class="label ae-5"><label class="left opacity-5" for="email55">Email address</label></div>
                  <input class="rounded wide ae-6" id="email55" type="email" name="email" placeholder="Email" required>
                </li>
              </ul>
              <div class="label ae-8"><label class="opacity-5" for="message55">Message</label></div>
              <textarea class="rounded left wide ae-9" id="message55" type="text" name="message" placeholder="Message" required></textarea>
              <button type="submit" class="button wide blue rounded ae-10 cropBottom margin-top-2" data-success-text="Done!" data-success-class="message-sent" name="button">Send message</button>
            </form>
          </div>
        </div>
      </div>
    </div>
  </div>
</section>
Notice that all the fields have a name attribute. This attribute is used to reference form data after a form is submitted. The name attributes used are name, email and message. In the PHP file, you can see the below code which gets data from the form fields and stores it in three variables.
/* DATA FROM HTML FORM */
$name = $_POST['name'];
$email = $_POST['email'];
$message = $_POST['message'];
We’ll customize our form and add more fields to it.
First, we add the fields in the HTML file.
<!-- White Slide 8 (#55) -->
<section class="slide whiteSlide">
  <div class="content">
    <div class="container">
      <div class="wrap">
        <h1 class="smaller margin-bottom-2 ae-1">Say Hello</h1>
        <p class="large margin-bottom-4 ae-2"><span class="opacity-8">Feel free to ask anything about our products.</span></p>
        <div class="form-55 fix-5-12">
          <div class="pad padding-top-2 shadow left selected ae-3">
            <form action="ajax-email.php" id="contact-form" method="post" class="slides-form wide" data-ajax-form="true">
              <ul class="flex noSpaces">
                <li class="col-6-12 form-55-input-1">
                  <div class="label ae-5"><label class="left opacity-5" for="name55">Your name</label></div>
                  <input class="rounded wide ae-6" id="name55" type="name" name="name" placeholder="Name" required>
                </li>
                <li class="col-6-12 form-55-input-2">
                  <div class="label ae-5"><label class="left opacity-5" for="email55">Email address</label></div>
                  <input class="rounded wide ae-6" id="email55" type="email" name="email" placeholder="Email" required>
                </li>
                <li class="col-6-12 form-55-input-1">
                  <div class="label ae-5"><label class="left opacity-5" for="phone55">Phone number</label></div>
                  <input class="rounded wide ae-6" id="phone55" type="text" name="phone" placeholder="Phone number" required>
                </li>
                <li class="col-6-12 form-55-input-2">
                  <div class="label ae-5"><label class="left opacity-5" for="region55">Region</label></div>
                  <select class="rounded wide ae-6" name="region" id="region55">
                    <option value="asia">Asia</option>
                    <option value="africa">Africa</option>
                    <option value="europe">Europe</option>
                    <option value="north_america">North America</option>
                    <option value="south_america">South America</option>
                    <option value="antarctica">Antarctica</option>
                    <option value="australia">Australia</option>
                  </select>
                </li>
              </ul>
              <div class="label ae-8"><label class="opacity-5" for="message55">Message</label></div>
              <textarea class="rounded left wide ae-9" id="message55" type="text" name="message" placeholder="Message" required></textarea>
              <button type="submit" class="button wide blue rounded ae-10 cropBottom margin-top-2" data-success-text="Done!" data-success-class="message-sent" name="button">Send message</button>
            </form>
          </div>
        </div>
      </div>
    </div>
  </div>
</section>
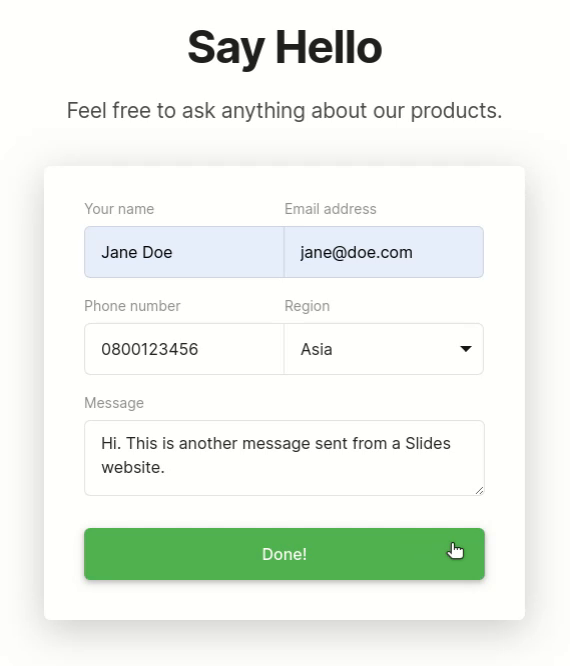
We’ve added a phone number field with name="phone" and a region select menu with name="region".
Now, let’s capture this data in the PHP file. First save it to variables:
/* DATA FROM HTML FORM */
$name = $_POST['name'];
$email = $_POST['email'];
$message = $_POST['message'];
$phone = $_POST['phone'];
$region = $_POST['region'];
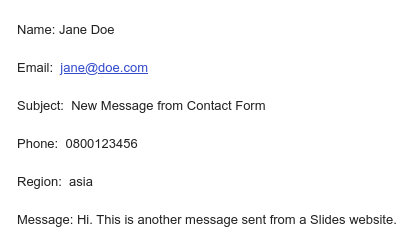
Then include the data in the message body that will be sent via email.
/* MESSAGE TEMPLATE */
$mailBody = "Name: $name \n\r" .
            "Email:  $email \n\r" .
            "Subject:  $subject \n\r" .
            "Phone:  $phone \n\r" .
            "Region:  $region \n\r" .
            "Message: $message";
To properly style the select menu, we add .form-55 .form-55-input-2 select in the CSS file, so that it uses the same rules that had been set for the .form-55 .form-55-input-2 input element.
@media (min-width: 1024px) {
  .form-55 .form-55-input-1 input {
    border-top-right-radius: 0 !important;
    border-bottom-right-radius: 0 !important;
    margin-left: 0;
  }
  .form-55 .form-55-input-2 input,
  .form-55 .form-55-input-2 select {
    border-top-left-radius: 0 !important;
    border-bottom-left-radius: 0 !important;
    margin-left: 0;
    position: relative;
    left: -1px;
  }
}
Notice the ae-X classes added to the elements. This adds animation to the elements. If the rest of your form uses animations, you should also animate the newly added fields for a uniform experience. The ae-X number determines the order of appearance of the element. The higher the number, the later it will appear.
With those changes, now our new form is done. You can see it below after data has been submitted:
And here’s the new email message with the added data.
You can also modify the other default fields, just make sure to also change the corresponding variable name in the PHP file. For example, instead of a name field, you might want to have first_name and last_name fields. After adding these in the HTML file, make sure you capture these in the PHP file (e.g. $first_name = $_POST['first_name'] and $last_name = $_POST['last_name']) and replace the $name variable in the file with your preferred one.
