
How to Upload an Email Template in Sendy.co
How to Upload an Email Template in Sendy
In this guide, you'll learn how to bring a Postcards email template into Sendy.co.
There are two ways to do it:
- Connect Sendy to Postcards with our integration and send your template across in one click — the fastest route.
- Export and paste manually — copy the HTML out of Postcards and create the template in Sendy yourself.
We'll also cover how to add Sendy's personalization tags (like the recipient's name and the unsubscribe link) so your emails feel personal and stay compliant. These are added inside Postcards before you send, so we'll start there.
Prerequisites
- A Postcards account
- A working Sendy installation that's already set up and running
- A finished email template in Postcards, ready to export
- (Optional) A text editor like VS Code, Sublime Text, or Notepad to open the HTML file
Step 1: Add Sendy tags inside Postcards
Sendy's personalization tags are small placeholders that get swapped out with each recipient's own information when a campaign is sent. So instead of every subscriber seeing a generic "Hi there," they can see their own name, and your footer can include a working unsubscribe link.
Sendy's tags are wrapped in square brackets and usually include a fallback value, like [Name,fallback=there] . When the campaign goes out, Sendy replaces the tag with the subscriber's real data or shows the fallback text if that field is empty for them. You can find the full list of available tags at the bottom of the template editor page inside Sendy.
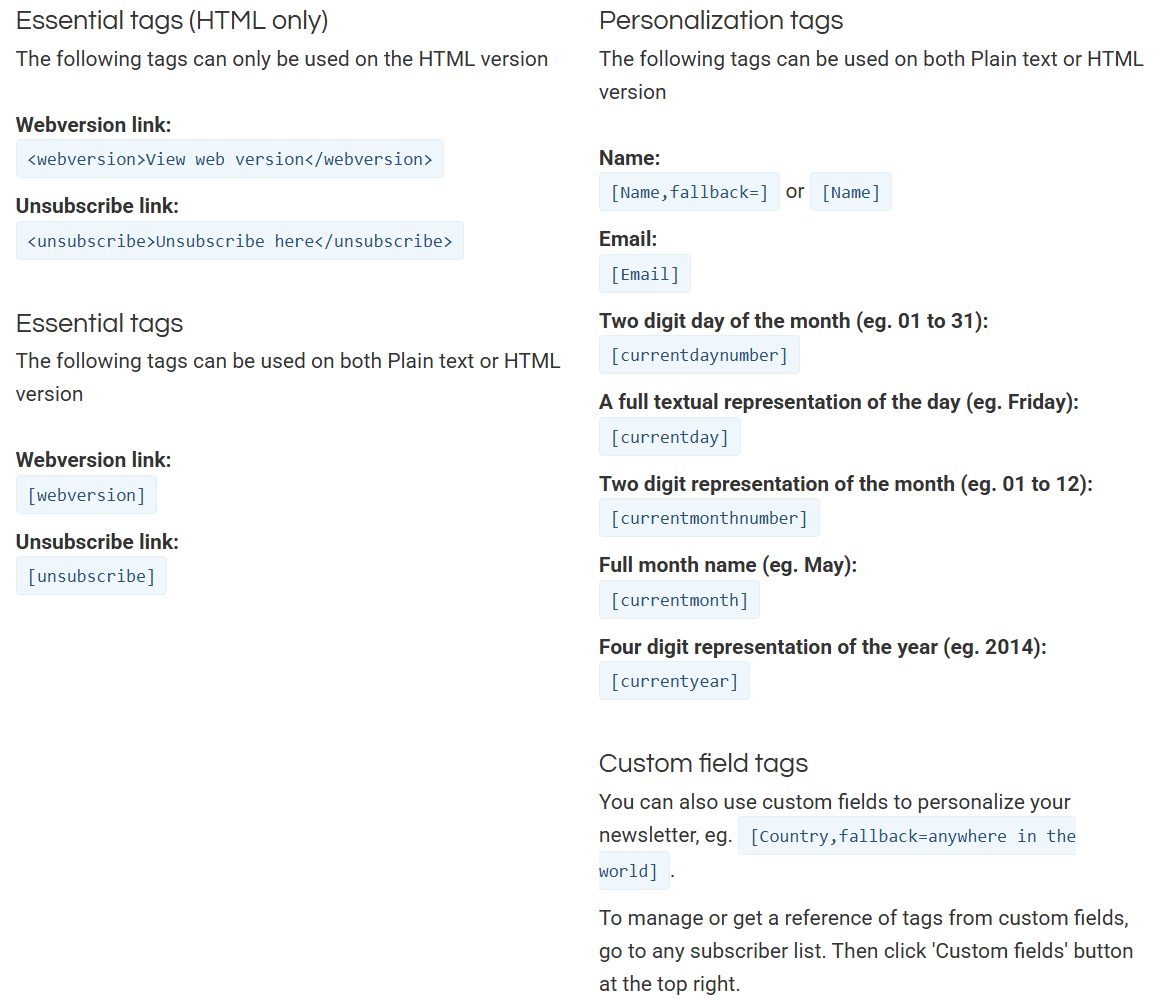
For this guide we'll use two common ones:
[Name,fallback=there]— personalizes the greeting with the subscriber's name[unsubscribe]— inserts the unsubscribe link (a built-in Sendy tag)
To add a tag in Postcards, open your template in the editor and click the text element where you want it to appear, or add a new text element if needed. Type or paste the tag exactly as written, including the square brackets. You can place it inline with regular text, for example: Hey [Name,fallback=there], thanks for subscribing!
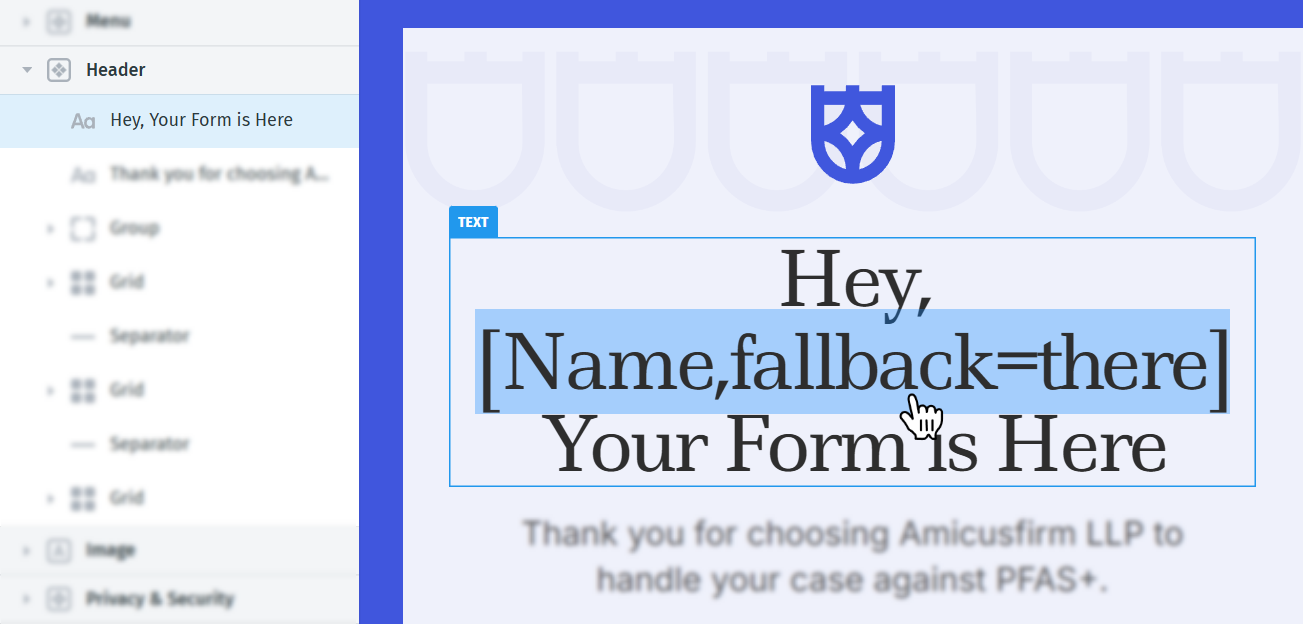
For the unsubscribe link, it's best to add [unsubscribe] as a hyperlink rather than plain text, so subscribers see a clean "Unsubscribe" word instead of a long raw URL. To do this:
- Type the word "Unsubscribe" in your footer, usually in the text element where your footer links live.
- Highlight it and click the link icon above the text.
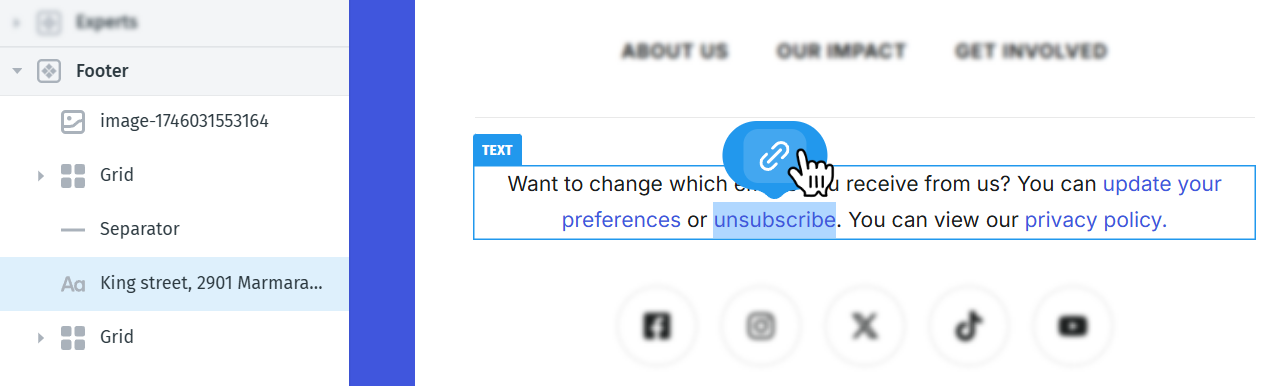
- In the URL field, paste
[unsubscribe]and apply the link.

One thing worth knowing before you test later: Sendy only fills in personalization tags when you send a real campaign to a list. If you use Sendy's test-send option, the tags will show their fallback values instead of real subscriber data, so don't worry if a test email shows "there" instead of a name.
Once your tags are in place, you're ready to export the template.
Step 2: Send your template to Sendy
Choose whichever method suits you. Option A is recommended — once connected, it takes a single click.
Option A — Connect Sendy and send directly (recommended)
With the Sendy integration, Postcards sends your template straight into your Sendy installation as a ready-to-use template. No downloading, no copying HTML.
Because Sendy is self-hosted, you'll need two things to connect it: your installation URL and your API key.
Connect your Sendy account (first time only)
1. Open the integrations list.
- In the Postcards editor, click Export (top right)
- Choose Send to Email Platform
- Click Add new integration at the bottom
- Find Sendy in the list and click the + icon

2. The connection window opens. You'll be asked for your Sendy installation URL and your API key.

3. Enter your installation URL. This is the web address where your Sendy instance lives — the same URL you use to log in, for example https://sendy.yourdomain.com.
4. Get your API key from Sendy. In your Sendy dashboard, click your account name in the top-right corner and choose Settings.

On the Settings page, find Your API key in the right-hand column and copy it.

Important: Copy the API key, not the license key — they're different, and they sit close together on this page.
5. Connect. Back in Postcards, paste the API key into the API Key field. You can optionally give the connection an Integration Name. Click Connect.

Your Sendy installation is now linked and will be available for future exports — you only need to do this once.
Send your template
With Sendy connected, click Export → Send to Email Platform → Sendy. Wait for the template to send, and you'll get a confirmation message.

To find it, go to All templates in your Sendy dashboard — your Postcards design will be listed there, ready to use in your next campaign.

Option B — Export and paste manually
Use this route if you'd rather not connect your installation, or you want to edit the HTML before uploading.
Export your template from Postcards
There are two quick ways to get your HTML:
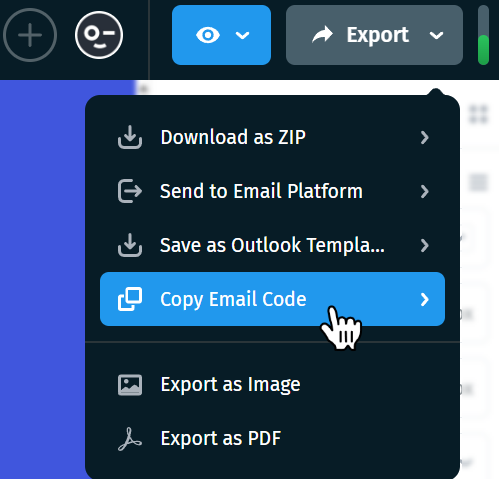
- Copy email code: In the Postcards editor, click Export in the top right corner and select Copy Email Code. This copies the full HTML straight to your clipboard.
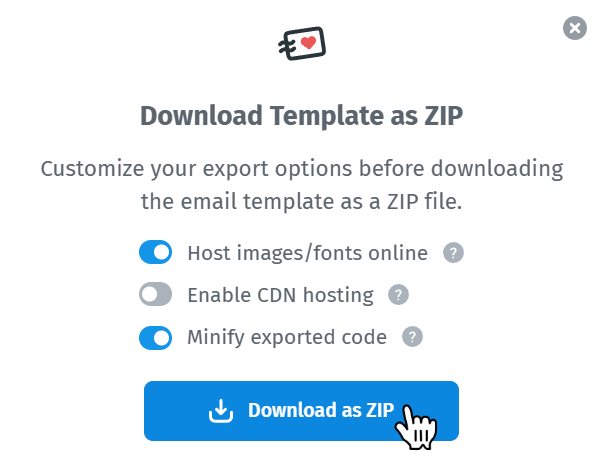
- Download as ZIP: Click Export > Download as ZIP, and make sure Host images/fonts online is toggled on.
- Extract the the index.html from the ZIP to a folder
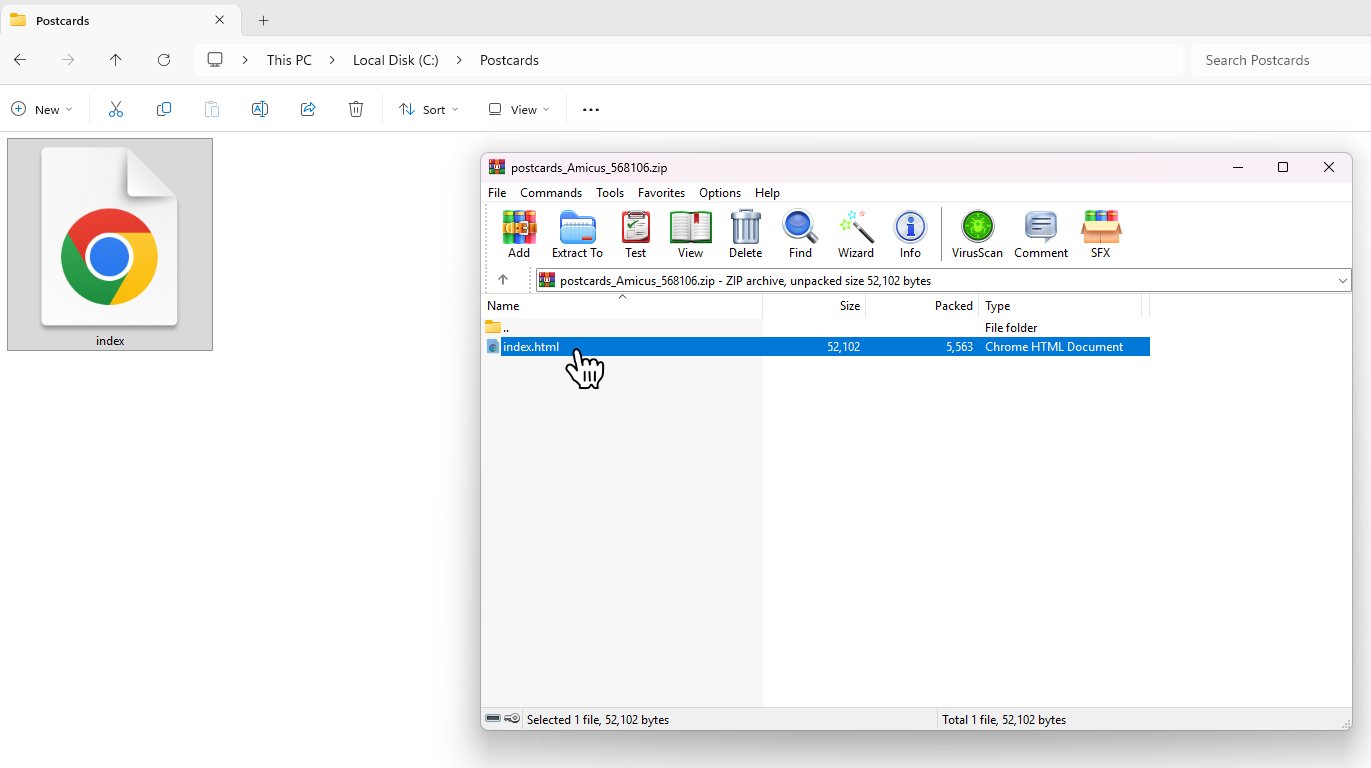
Open the index.htmlfile in your text editor, and copy the entire code.
Either method works. The Host images/fonts online option matters here, with it enabled, your images load from absolute URLs hosted by Postcards, so they'll display correctly in your emails without uploading anything to Sendy.
Step 3: Import the code into Sendy
Now we'll create a new template in Sendy and drop your Postcards code into it.
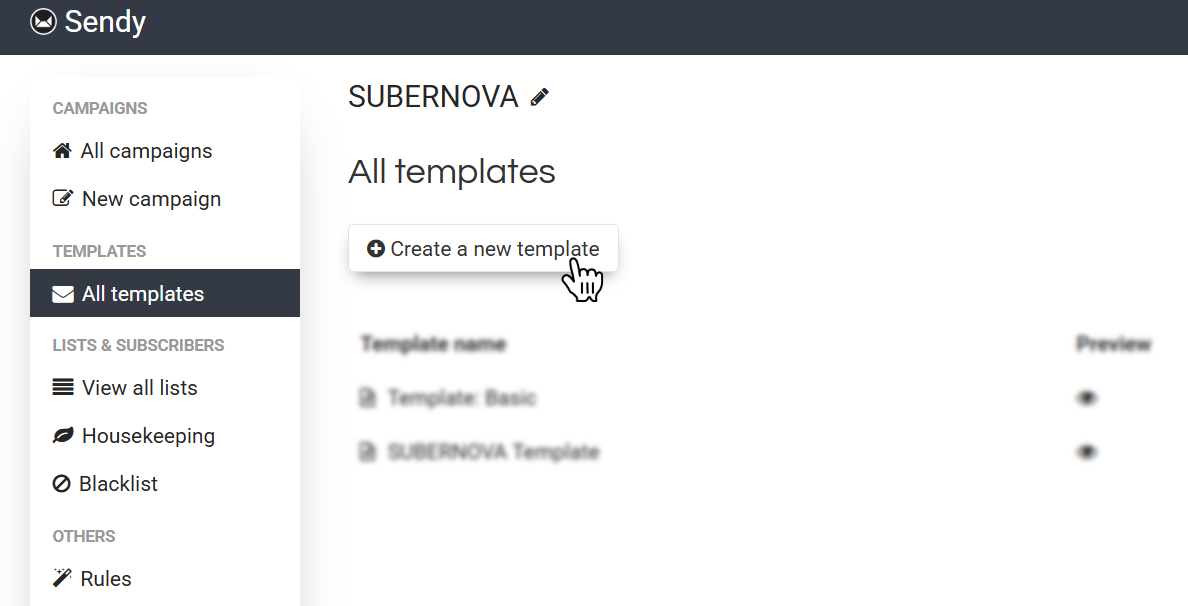
From your Sendy dashboard, head to the panel on the right and click All templates.
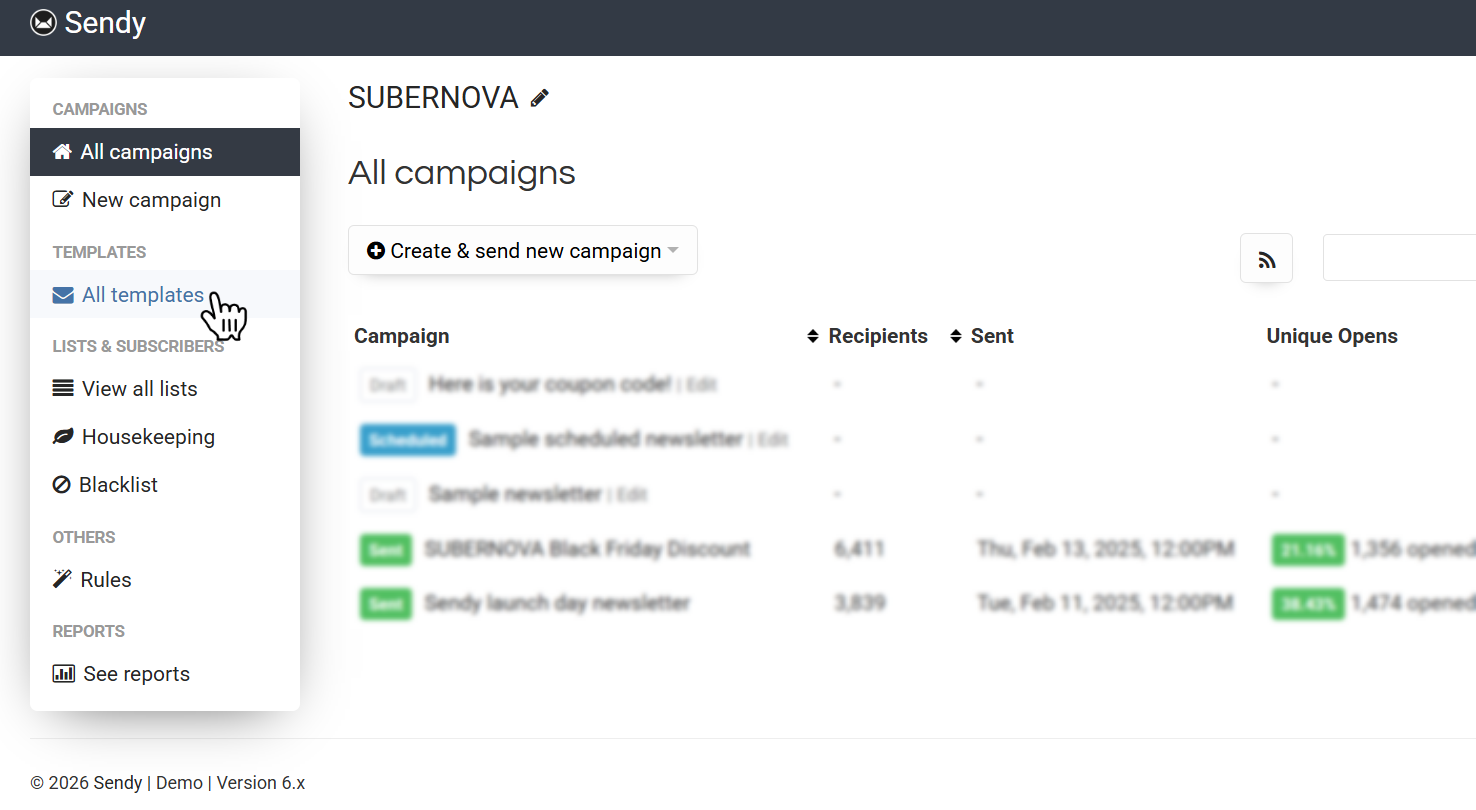
Then click Create a new template.
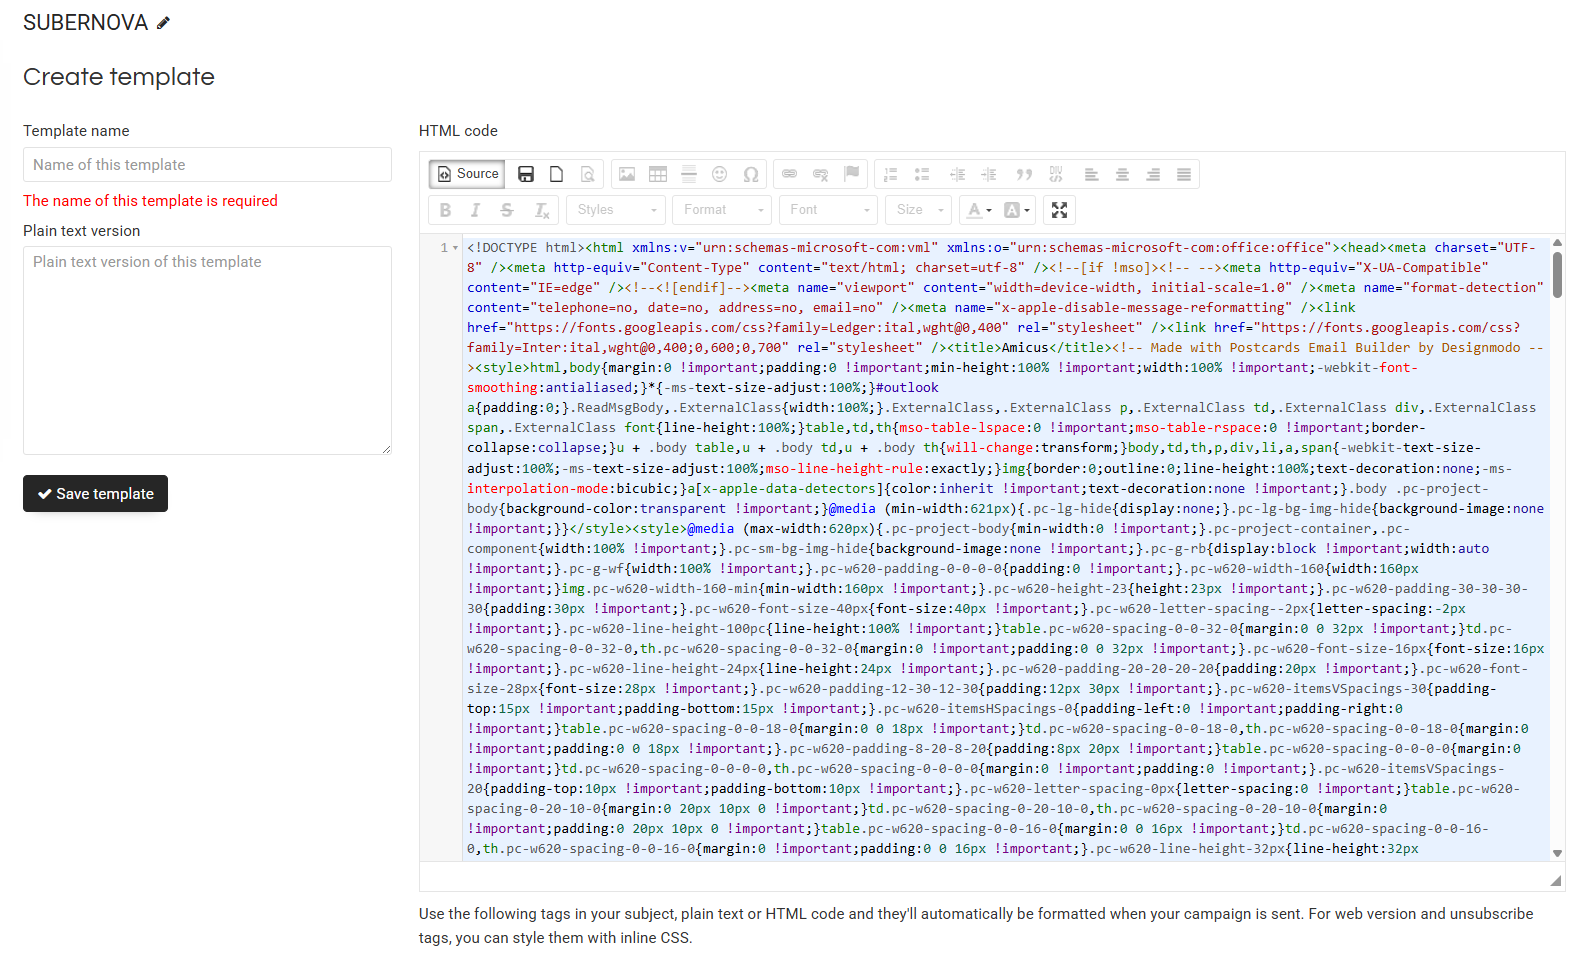
You'll land on the Create template page with a name field, a plain text version field, and an HTML code editor on the right.
To paste your Postcards code, click the Source button in the top-left of the editor's toolbar, this switches the editor from its visual mode to raw HTML view, which is what you need for a Postcards template.

You'll see some placeholder HTML already in the editor. Select all of that placeholder code, delete it, and paste your Postcards HTML in its place.
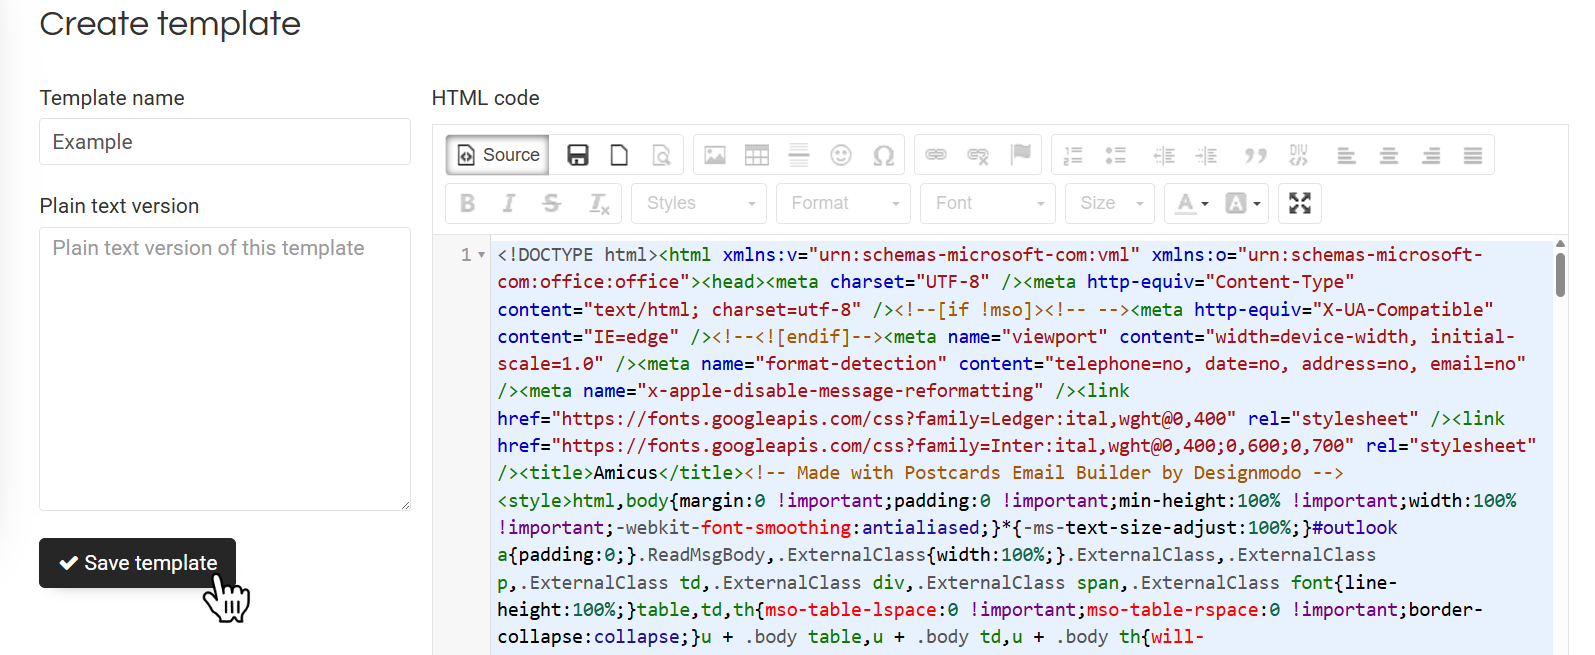
Once your code is in, give your template a name in the field on the left so you can find it later. If you'd like, you can also add a plain text version of your email in the text area below, this is shown to recipients whose email clients don't support HTML, and including it can help with deliverability. It's optional, though.
Finally, click Save template at the bottom left. Your Postcards design is now saved in Sendy as a reusable template, ready to be selected the next time you create a campaign.
What we covered
- How to add Sendy personalization tags inside Postcards before sending
- How to connect your Sendy installation and send a template in one click
- How to export your Postcards template as HTML or copy the email code
- How to create a new template in Sendy and paste in your code using the Source editor